Friday, October 24, 2014

Grow Veggies & Fruit trees in Containers (Limited Space & Urban gardening)

I don't usually grow food in containers because I focus on growing in permanent locations. However several years ago I had found several 5 gallon buckets in the woods, and decided to grow Tomatoes in them. The tomatoes were Volunteers from the compost pile. We were happy to find out that they were Grape tomatoes which Flower early in the Summer season and continue to grow later in the Fall and winter season.


"tomato from compost pile"
Last year I grew vibrantly green and succulent leafs of Lettuce in large pot of leaf matter and Compost (Seen in the photo below). This container of Lettuce was started in August (2013) and I was able to harvest from them up until mid-November.


I don't remember why I transplanted the Jalapeno pepper to a Container (in the photo below), but obviously in a medium-sized container, at least one pepper plant can flourish and produce many peppers for months!

Jalapeno pepper plant (2013)
For those renting a home, apartment, or for those with limited space, have the ability to grow food in a container garden. Re-purposing food containers, buckets, and plastic bottles allows you to grow food for little to no money; and this process keeps your trash out of the landfill (no garbage payment either!)
When you purchase fruits and vegetables from the farmer's market or grocery store, you will be able to save seed, cuttings, or roots from your foods to re-plant. Celery, radishes, onions, potatoes, lettuce, and even pineapple scraps can be grown from the parts you would usually discard into the compost. And of course all of these foods can be grown in containers! Surprisingly, potatoes can be grown in a small confined space.

There are a plethora of container gardening systems and designs. Last week I posted a video on Growing Food in small raised beds from OneYardRevolution: How to grow food in a small space. In a much older blog post, I made little effort in demonstrating ways of growing food in limited spaces, thus I wanted to revisit container gardening in more detail now. In the older post, I mentioned using Terrariums, Vertical structures, and Containers to grow food in temporary living situations, which you can see here: Three ways to grow food & Other plants for Apart Dwellers (Indoors/Outdoors).

Mike Lieberman of Urban Organic Gardener

Many apartment dwellers grow food on a patio, along the steps, or inside the home next to a South-facing window. Mike Lieberman was a great example of Urban gardening, as he grew his vegetables on his NYC fire escape. He has many YT videos on how to grow food in buckets, pop bottles, and other great apartment gardening tips. His most popular YT videos included: How To Make A Self-Watering Container Using 2 Container, and a tour of his Urban Gardening in Small Spaces.

Some of the most impressive Vertical/Micro gardening methods include hydroponic and aeroponics systems. In the video below, a Wisconsin couple grow vibrant and healthy tomatoes, peppers, and cucumbers, in the Winter time using containers and aeroponic systems. The Wisconsin couple prove it is possible to grow vibrant plants in a limited space with small containers-- even in the Winter, and without soil! The couple's main focus is providing light, and a mist mixed with a mineral-rich solution. And you can completely run your system off of rain water collected:


I also believe we can grow an impressive amount of food using free, re-purposed, and recycled materials, like 5-gallon buckets or Pop bottles like Mike Lieberman's garden. The Pop bottles function like a slow drip irrigation system, and a Frost protector when starting vegetables outdoors early in the year. What's also great about collecting pop bottles, is you can make some impressive greenhouses and even homes using Pop bottles, see here: Construct a greenhouse using Free Supplies.

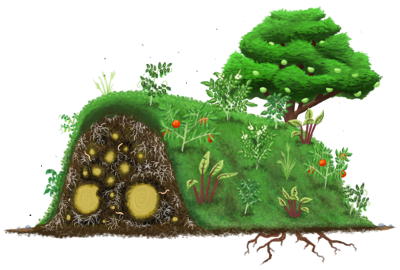
The following two photos are snapshots taken from Desertification video, which I posted here at Reuse trash for Container Gardening.
photo source: desertification

photo source: desertification
photo source: Useful trash
There are many tutorials on how to construct your own Pop bottle garden, whether indoors or outdoors. You can make these systems as cheap and easy or professional. Personally, I prefer reusing plastic bottles for starting plants rather than growing plants to maturity. The soil in Containers dry out quickly, especially in smaller containers, so you may need to water plants more often. The nutrients in the soil will deplete quicker, and it will be necessary to add liquid fertilizer (i.e. compost tea) several times.
Many herbs and greens can be grown in a small container indoors, even in the snowy Winter months. Containers as small as Pop bottles can be used for starting plants indoors several weeks before the Last Frost date. After a month or so of growth, you can transplant your starters in large containers, like 5 gallon buckets or other recycled growing containers.

Mentioned earlier, I found 5-gallon buckets in the wood once, and several alongside the road, so I know you can find a collection of buckets for free or inexpensive. I have also seen some very impressive craftsmanship and creativity when growing in 5-gallon buckets.


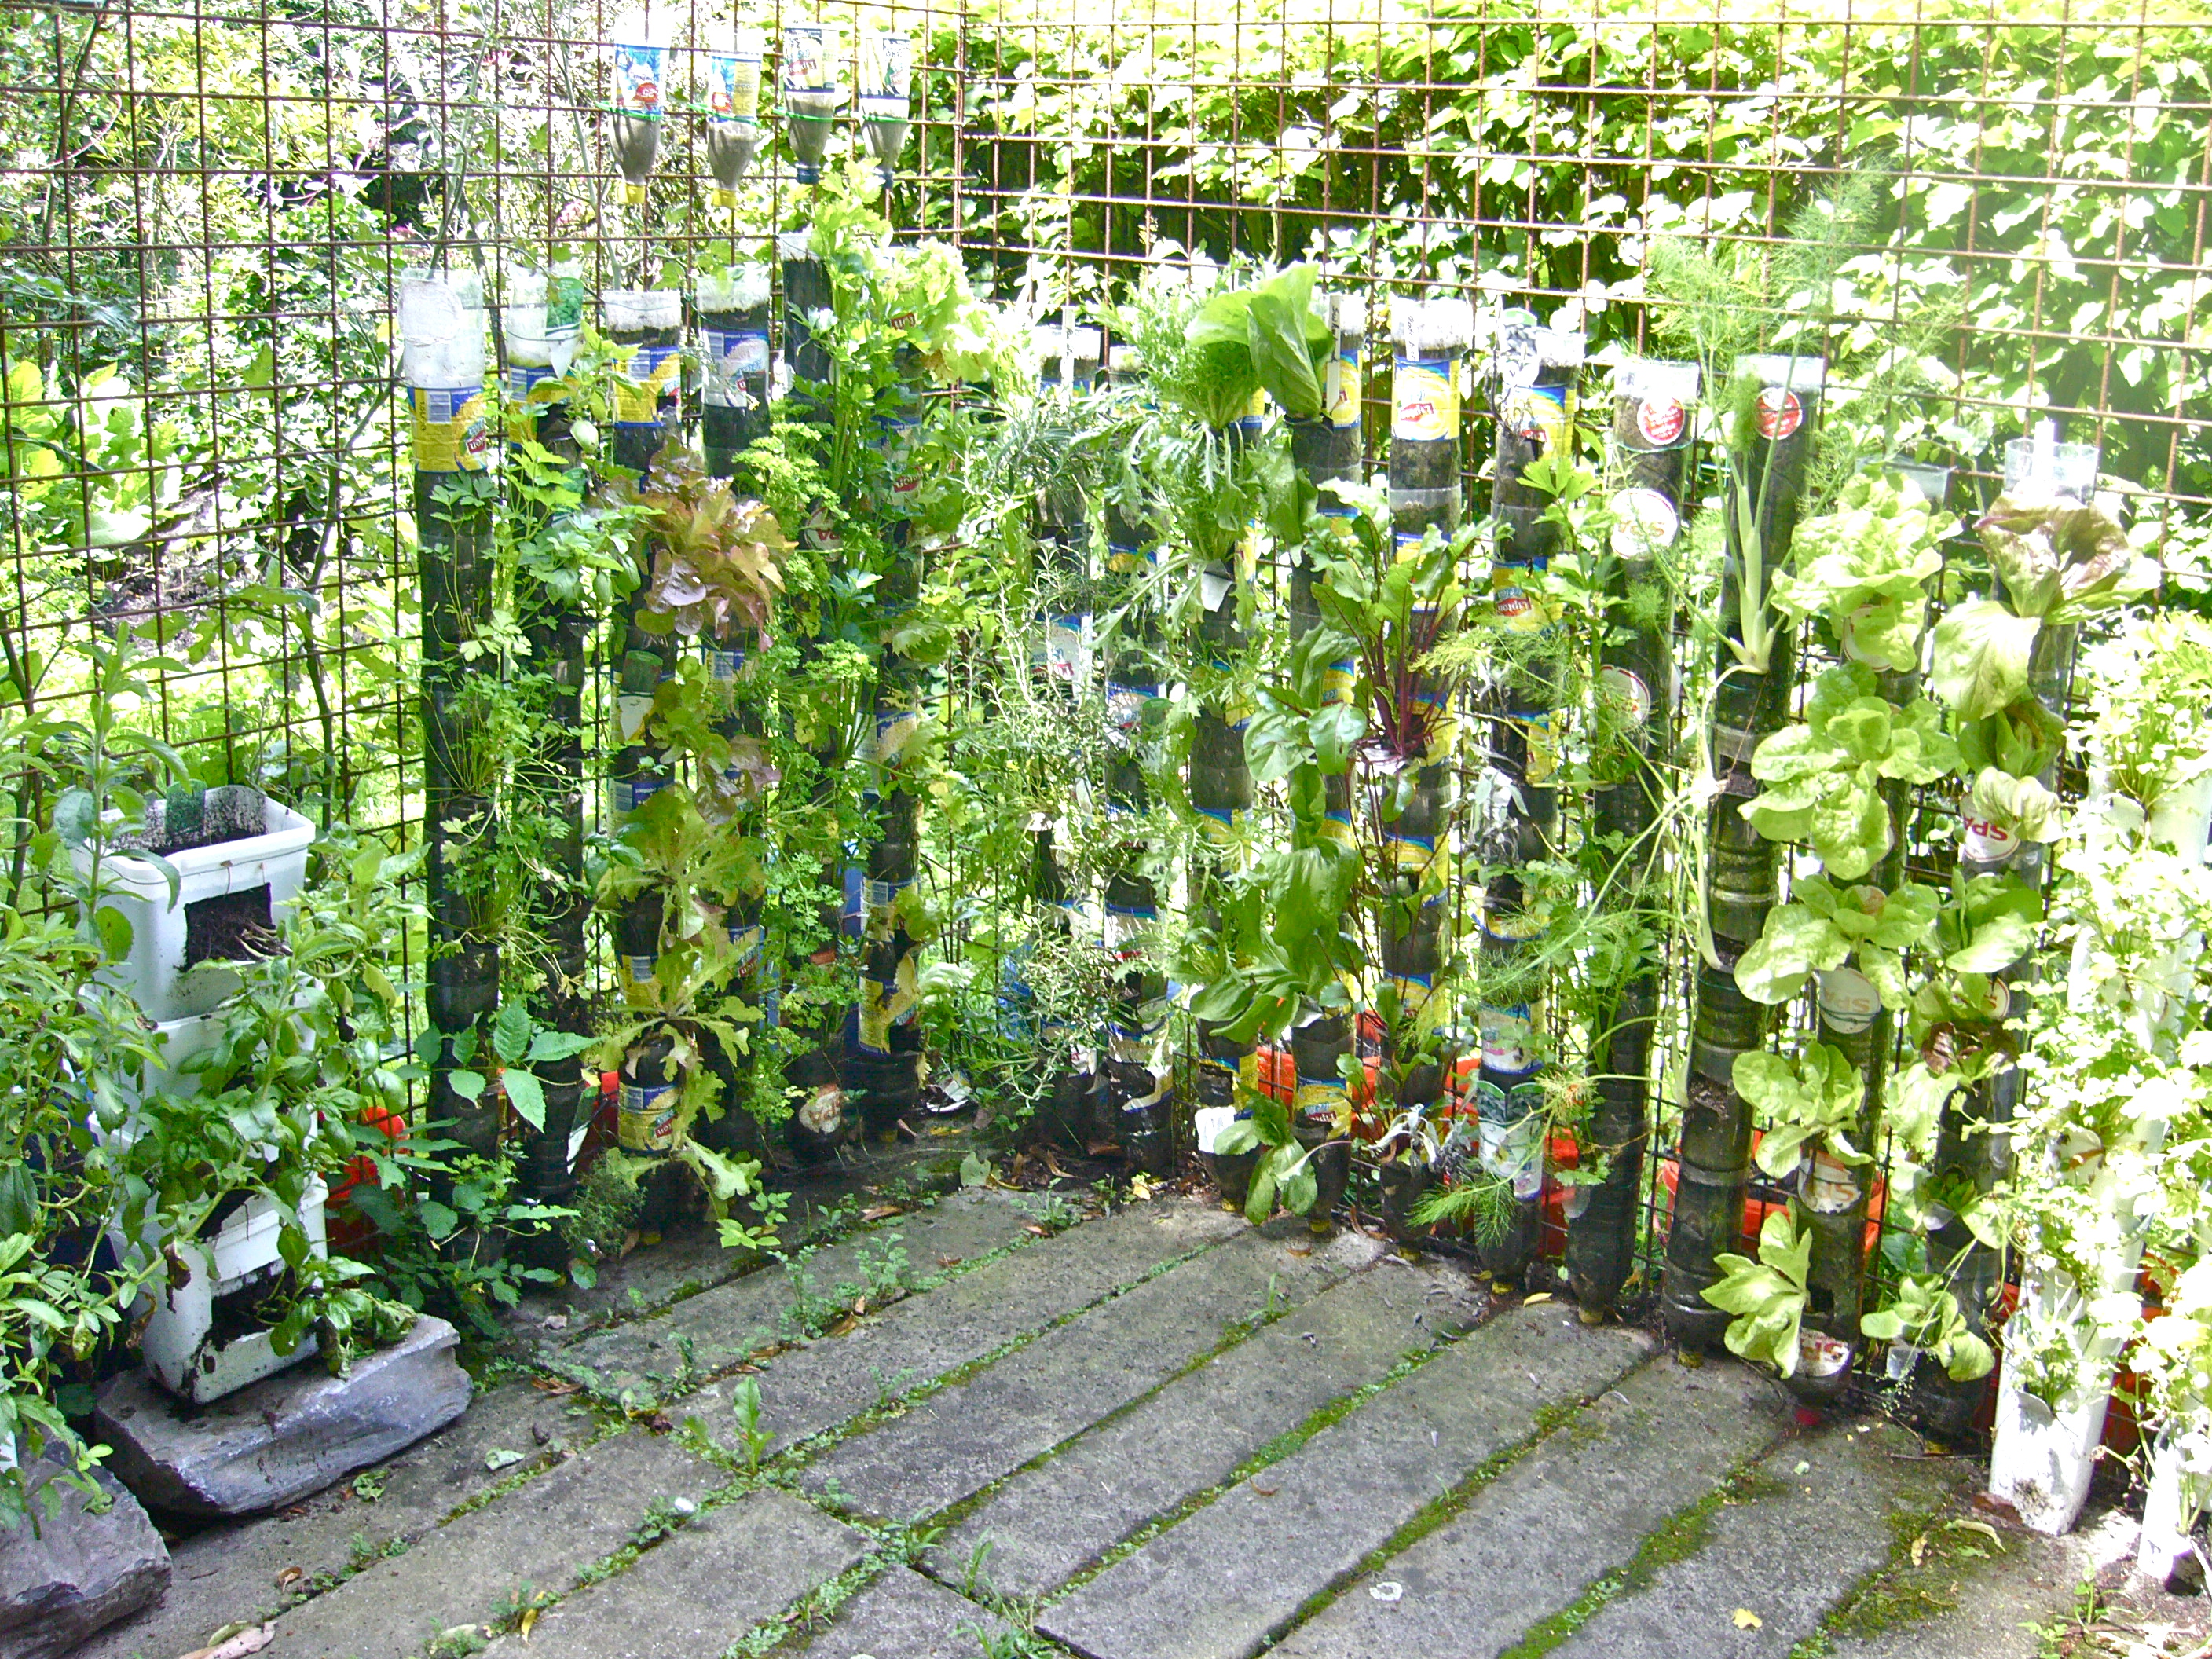
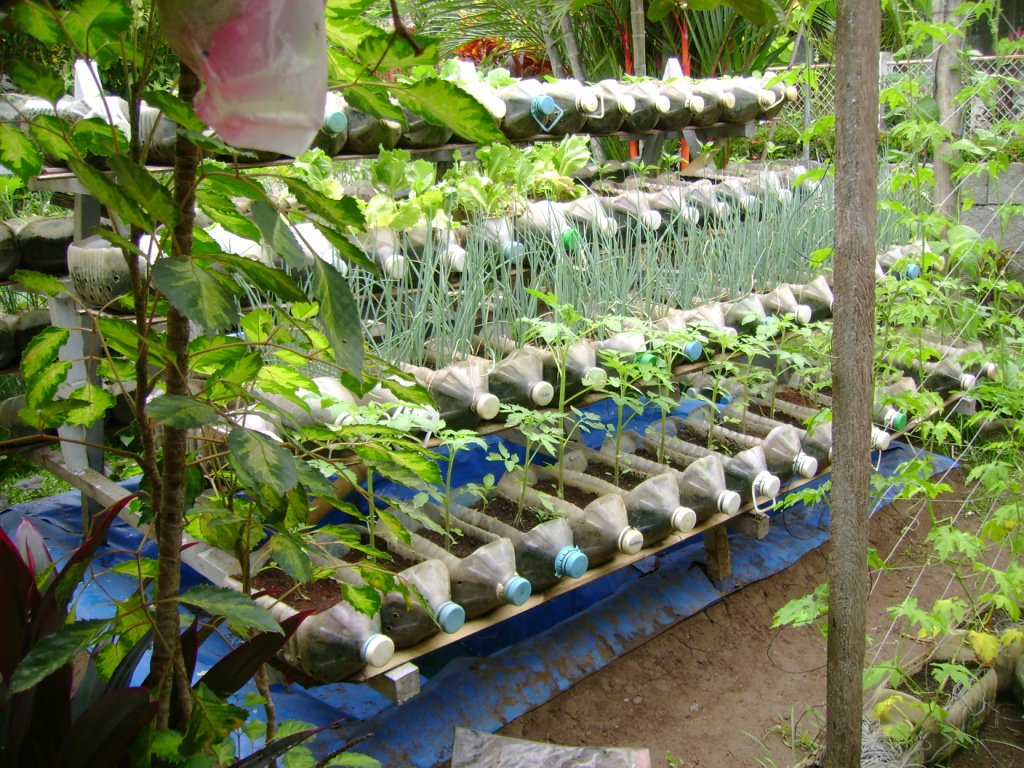
When growing outside of the apartment or indoors, Vertical Gardens seem to be most useful and efficient way to utilize your space. In the older post I mentioned Vertical Gardens using Wood Pallets. Wood Pallets can be collected for free at many store locations. Pallets don't have to be disassembled to reconstruct into a raised bed, but you can simply staple plastic on the back of the pallet, add dirt in between the holes, and plant.  The following pictures below are good examples of using Vertical gardening space.
wood pallet photo: emerald+ella blog

photo source: fivegallonideas.com
photo: Community gardening blog

So far I have shown you how to grow in Containers outdoors, but I want to show you indoor methods of Gardening in Containers. Because you're growing indoors, you can control the temperature and moisture of the plants, and prevents bugs from eating the plants.
No need for rain barrels when growing indoors! Collect water from the dishes you wash, or even collect water when you're taking a shower. Even sitting out a bowl, glass, or some container outside will collect rain for you to water your plants.
The picture below is a great example of making use of Vertical Garden space Indoors. 

photo: Living Apartment
One major downfall from growing indoors is the amount of sunlight and natural air. On sunnier/warmer days, allow your plants some time outside. When growing veggies indoors, grow near a South-facing window or a window that receives plenty of sunlight throughout the year. If adequate sunlight is an issue, installing grow lights is easy and inexpensive if growing on a small scale. If you have several lamps and light bulbs, you could even place your lamp light over or near your plants.

Mentioned earlier, greens, sprouts, and herbs are some of the best plants to grow in small containers, especially indoors because they have small root systems. But do not limit yourself to greens and herbs alone. With the tops of Radishes, bottoms of Onions and Celery, and eyes of the Potato, you can plant these in a pot of soil. Radishes are ready to harvest within 20-30 days. Tomatoes can be started in a container indoors throughout the Spring, and taken outside in the Summer. Some varieties of Fruit trees, like Limes, Lemons, Mandarin oranges, and Figs can be grown in large containers indoors as well.
Pintrest
 
Because growing Fruit trees is my main goal, I am intrigued by those Gardeners that have many varieties of Fruit growing in large containers. Below are some of the photos I found that demonstrates you can grow small to large Fruit trees in small to large containers. I highly recommend researching the Dwarf variety Fruit trees as these are best suited for limited spacing conditions.

Pomegranate photo: A Kitchen Garden in Kihei Maui

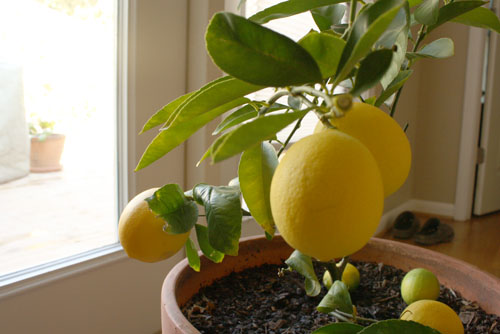
photo: Eat Drink Better
Photo: the Micro Gardener

Dwarf mango photo: Daleys Fruit tree blog
Photo: The Lettuce Farm

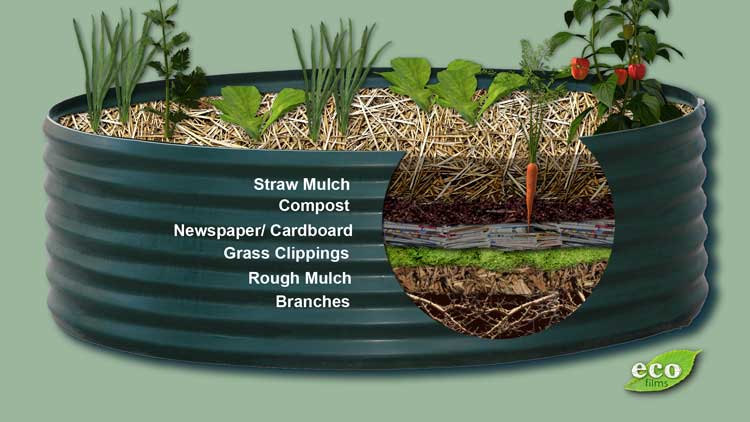
Don't rush out to your nursery to purchase exotic fruit trees just yet! Locate a few large containers, and begin filling the containers with food scraps (compost) and add leaves, or other wood debris to the containers. Over a few months time the compost and mulch will decompose into nutrient-dense soil. Now that you have your containers filled with the adequate soil, it is time to transplant some Fruit trees!
All fruit trees and bushes have specific soil needs and conditions, so do some research beforehand. For example, Apples, Pears, Blueberry bushes prefer a soil pH between 6.0 and 6.5 (acidic soil), while Apricots and Oranges prefer a soil pH above 7 (alkaline soil). Fortunately many Tropical fruit trees tolerate acidic clay soil. Of course it's not just the specific pH of the soil. Fruit varieties have specific watering and sunlight needs.

Seeing these Tropical fruits growing in Containers gets me excited to do the same. I could buy (or find) a 20 gallon pot, fill the pot with compost, leaves, and other mulch materials, then cut the top off of a Pineapple and plant it in the pot of soil. After a couple of years, the Pineapple fruit will look similar to the one in the picture above.

Container gardening does not have to be limiting. Although you may feel limited in the amount of space you have outside or inside your apartment; and although you may not be able to have a permanent garden, gardening in containers creates endless possibilities. Take your freedom back, and plant a garden anywhere! Expand your gardening skills outside of your apartment or Rental home by Starting a community garden, or Ask your Parks and Recreation department if you can plant fruit trees within the Park. This will encourage others to donate fruit trees, and possibly provide homeless peoples with free food.

Tuesday, October 21, 2014

Fall 2014 Gardening Projects

Much of the expansion work that goes into my garden begins in the Fall season. During the Spring and Summer I am not focused on expanding the garden because I am growing food at that time. In the Fall and Winter I am usually growing a small lettuce or kale garden but I can still work around it.

For now I am expanding the garden by including new Fruit trees; mulching all the Fruit trees; cleaning up ivy around the property line; making raised beds with logs; and constructing Hugelkultur beds.

I'll begin by talking about the Fruit trees I am transplanting.  A native fruit to Kentucky, the Paw paw, can be found growing in damp, shady locations of wooded areas. My grandparent's have a small grove of Paw paws (over 100) in their woods. The trees have not started to fruit, either because they need a pollinator of a different variety of Paw paw, or they are still too young. Luckily, I (think) I have found a Paw paw grove in the woods behind my house. So I have transplanted five (young) Paw paw trees on my property, and soon I will transplant several Paw paws from my grandparent's woods. Paw paws are generally self-incompatible, so you need two trees for cross-pollination. Plant at least two different cultivars or seedlings. Two grafted trees of the same cultivar will not cross-pollinate. Hopefully because I transplanted young trees and because I will be planting two different varieties, the trees will grow quickly in the Full sun and produce fruit within the next couple of years.

Paw paw transplant

This may be the only tree to survive transplant


As stated I have already begun to clean up the bank for transplanting Paw Paw trees. I intend to transplant additional Nut and Fruit trees along the edge of the property line.
Because we have woods connected to our yard, along the edge becomes a wily mess of entanglement. I want to clean up the 3/4 of an acre, add mulch, cardboard and rock to "structure" the area, then dedicate every inch of the property to Fruit trees, vining Fruits, nut trees, Flowers, garden, a pond, Cob home, and solar panels.
The cleaning process is a lot of work because I am sourcing logs, sticks, leaves, soil, and native plants from the woods. I am able to create my projects for Free, but this takes much more manual labor. I am not buying soil or mulch from a big-box-store, I am collecting materials by hand, and carrying buckets (or barrels) of soil, leaves, rocks, and plants from the woods to my home. And I am carrying 80 lb logs from the woods to my home.
So you can see where these projects are a slow process, but beautiful and fulfilling nonetheless.

Secondly, I am practicing Hugelkultur methods within my first garden; and also making Hugelkultur raised beds in other locations of the yard. Hugelkultur, German word meaning mound culture or hill culture, where decaying wood debris and other compostable biomass plant materials are added to composting raised beds. For an explanation and example of Hugelkultur, watch this video by Paul Wheaton, here.
I'll continue to update you on the progress of the Hugel beds. As you can see in the photos below, the beds of logs, sticks, and leaves are the first phases. Eventually, additional compost, leaves, and other mulching material will be added to make nutrient-dense soil for planting.

I'll continue to update you on the progress of the Hugel beds. As you can see in the photos below, the beds of logs, sticks, and leaves are the first phases. Eventually, additional compost, leaves, and other mulching material will be added to make nutrient-dense soil for planting.

Phase 1 of Hugel bed 1
Phase 1 of Hugel bed 2

Phase 2 of Hugel bed 2
I am also using the Hugelkultur methods within the garden. See below in the photos how in between rows, I have layered the bottom with large logs then small sticks and leaves at the top. Eventually these beds will have compost and additional leaves/mulching material which will break down over winter.


From the Pine trees (you see of the background in the photo below) I have collected Pine needles to use as mulch, which I have used on the 7 blueberry bushes you see in the photo.


Pine needles as mulch around blueberry bush
I have also been mulching my Fruit trees with pine needles as well, including the Pears, Peach, Plum, Strawberry beds, Cheery trees, Fig trees, and Grape vines.

Kieffer Pear

Kieffer Pear

Damson Plum
 
Chicago Hardy Fig

Chicago Hardy Fig
Concord  Grape
Concord Grape
3 Strawberry beds mulched with pine needles

Golden Jubilee Peach
 Additionally, I have been hauling pieces of logs from the woods to create raised beds. Below you can see I have completed two beds framed with dead logs. I have already started on a third raised bed. It took me several days to scope out pieces of logs in the woods, compile them, then haul them down the hill to my house. In the photo below are the two completed raised beds, and in the upper right corner, you can see the four of the five Paw Paw trees transplanted.


As the Fall season progresses into Winter, I will continually add Pine needles to mulch the Fruit trees, fruit bushes, especially the newly transplanted Paw Paw trees. Once all the leaves have fallen off the trees, I will use them to mulch my garden.
Perhaps I will have to resort to collecting leaves from the woods if I run out of leaves to rake around my yard! I'll also still collect logs and branches from the woods to use in the Hugelkultur mounds.

Although I do not count this as a gardening project or task, I am spreading the seeds of fruit, including pears, apples, and persimmons around my yard. All Summer I threw out Tomatoes and other rotting fruits around the yard rather than the compost to see if Volunteer plants come up. Hopefully I will see fruit trees spreading across the yard.

Of course other gardening tasks will keep me busy, such as cleaning up the property line of brush, ivy, over grown weeds. This will be a process over Winter which will include laying out plastic or cardboard along the property line, then adding rocks and mulching to create a presentable-look. Then I will plan to begin transplanting Nut and Fruit trees within these areas. 

As if all these projects were enough to keep a woman busy for months, I have also started on digging the Trench for our Cob home, which you can see in this video: Digging outline for Cob home trench.

I highly encourage everyone to see the freedom and pride of growing food. Food is the number one necessity, and can even be linked to all the worlds problems. Eating the food with which you grew, and expanding this ideal to every household and every being could create a self-healing community.
Gardening can be a full-time job once you realize the potential of the land around you; and how much space you can utilize. Even 3/4 of an acre has the potential of feeding at least two people all year round. And because gardening can be absolutely as Free and primitive or expensive and technological as you desire, you can create a self-sustainable system which withdraws you from the greedy scheme of the 1 percent, lobbyists, government, and media. 

Thursday, October 9, 2014

No money, work, or tilling involved: Permaculture

Permaculture, also known as "Permanent Agriculture" or "Permanent Culture" encompasses Seven functional components that act like a Forest: 1. The canopy (i.e. tall trees); 2. Understory layer (i.e. trees that revel in the dappled light under the canopy); 3. Shrubs (i.e. berry bushes); 4. Herbaceous Plants (i.e. annuals, biennials or perennial culinary and medicinal herbs); 5. Ground cover (i.e. Cover crops such as clover or any Plants that grow dense and closer to the ground); 6. Rhizosphere (i.e. Root layers within the soil like fungi); 7. Vertical layer (i.e. "runners" and Vining plants like beans).
PermaGarden

 
According to Holmgren, the Twelve Permaculture design principles include:


  1. Observe and interact: By taking time to engage with nature we can design solutions that suit our particular situation.
  2. Catch and store energy: By developing systems that collect resources at peak abundance, we can use them in times of need.
  3. Obtain a yield: Ensure that you are getting truly useful rewards as part of the work that you are doing.
  4. Apply self-regulation and accept feedback: We need to discourage inappropriate activity to ensure that systems can continue to function well.
  5. Use and value renewable resources and services: Make the best use of nature's abundance to reduce our consumptive behavior and dependence on non-renewable resources.
  6. Produce no waste: By valuing and making use of all the resources that are available to us, nothing goes to waste.
  7. Design from patterns to details: By stepping back, we can observe patterns in nature and society. These can form the backbone of our designs, with the details filled in as we go.
  8. Integrate rather than segregate: By putting the right things in the right place, relationships develop between those things and they work together to support each other.
  9. Use small and slow solutions: Small and slow systems are easier to maintain than big ones, making better use of local resources and producing more sustainable outcomes.
  10. Use and value diversity: Diversity reduces vulnerability to a variety of threats and takes advantage of the unique nature of the environment in which it resides.
  11. Use edges and value the marginal: The interface between things is where the most interesting events take place. These are often the most valuable, diverse and productive elements in the system.
  12. Creatively use and respond to change: We can have a positive impact on inevitable change by carefully observing, and then intervening at the right time.

Some Permaculture practices use animals like chickens or ducks to eat pests while fertilizing the garden with their scat. Also some people that practice permaculture will have chickens to eat their eggs or to eat the chicken. Obviously I am not promoting this type of Permaculture practice. I am specifically speaking for Vegan Permaculture practices where no animals are involved in the process. The use of animals may be "natural" to some, but I see nothing natural about domesticating an animal. Perhaps going into the woods and reclaiming deer scat isn't unethical and maybe this is a "Vegan" way to utilize manure. But again, we can use our own human waste for compost/nitrogen.

Overall, Permaculture is an ethical, ecological, and science based gardening design that practices sustainability, avoids chemicals, and machinery (that runs on petroleum oil). This philosophy extends to avoiding the exploitation of land and animals. The idea is to recreate the aspects of a self-healing, self-working food forest. Fruit and nut trees and fruit bushes maintain themselves. In fact they continually add loads of seeds to the ground every year, creating more fruit and nut trees. Fruit and nut trees provide pounds of food for years and even decades. Perennial flowers and herbs also grow year after years providing and aesthetically pleasing garden/yard. As many Perennial flowers you can add to your garden the better. As long as you can keep many bees around, you will be able to pollinate your fruits and vegetables. 

In Permaculture design, tillers and other machinery are not used because they are absolutely not necessary and they do more harm than good. In fact, No-till gardening allows for natural aeration of the soil, promotes natural drainage, saves water, reduces the need to weed, reduces soil erosion, saves time and physical exertion, retains life, and eliminates the use of petroleum oil.
The beauty of this philosophy is that there is hardly any money or work involved, especially if you're using materials on your land to create a food forest.

 No-till gardening allows us to build up an existing ecosystem by layering  the soil with carbon ingredients (i.e. cardboard, leaves, pine needles, straw, newspaper), and nitrogen ingredients (i.e. compost, weeds, urine, humanure). Instead of tilling (which damages ecosystems and does not build up soil), layering of "ingredients" perfects the nutrition, aeration, drainage all while retaining enough moisture to save water.

picture from Eco Films

Also, cutting your grass with a lawn mower is unnecessary if you're utilizing every space of your property (or yard). Mowing a lawn does not create a beneficial habitat for insects and animals. Not only that, but there is a reason a Forest is dense and the ground is shaded. A shaded ground will compost material faster, holding nutrients in, while a shaved lawn will expose the ground to the Sun taking away nutrients from the soil. However with a Knife or clippers, pruning dead or over-grown weeds can be used as mulch.

Going back to the Forest, you notice there is hardly any grass growing, perhaps in patches. But a Forest floor has been taken over with abundance of Trees, shrubs, leaves, Flowers, rocks, moss, Fungi. All of these aspects create a self-healing (self-working) mechanism which you can benefit from. It only takes you to mimic the rules of the Forest, and plant these things.

There is no such thing as a Pest in Permaculture. All insects and animals have their place, and it is up to us to know the beneficial insects. For example, Praying mantis, Wasps, Granddaddy long-legs, lady bugs eat harmful bugs. Instead of spraying Brassicas with repellants, add sawdust (which slugs and caterpillars hate) around susceptible plants like Cabbage. Any Cabbage loopers or worms can be relocated onto their own Cabbage plant (separated from the garden).
Permaculturists have noticed that young or weak plants are more susceptible to insects eating an entire plant; it seems that the nutrition from the soil which produces large and healthy plants,  will not be susceptible to insects.
Sometimes it's a matter of adding a native plant for the insects to eat. Many insects will avoid eating your food if you provide them with an alternative like a native plants (ild Mustard and Plantain weed). Marigolds are also beneficial in the garden. Growing Peppers, onions, garlic, and herbs around susceptible plants will also ward off harmful bugs. 

The intention in choosing natives, medicinal herbs, and other plants is to grow those that serve many purposes. Many Permaculture gardens contain Moringa Oleifera-- known as the most nutrient rich plant in the world. The Moringa can be made into a compost tea to feed plants,  or the cuttings can be used to mulch the garden which will still add nutrients. You can even make a tea out of the leaves for yourself. Fruit trees or usually serve many purposes, not to mention producing pounds of food, but provides shade for  plants growing below.
Beans also serve many purposes, adding nitrogen into the soil for surrounding plants. For example in the Three Sisters method, growing Corn, Beans, and Squash in close proximity. The beans will act as Fertilize to the Corn while the Squash will smother out other intruding plants. The Corn acts as a pole for the Beans to crawl up as well.
Choosing plants that serve many purposes is similar to Companion planting. For instance, Carrots love Tomatoes, Roses love Garlic.

Picture from Two Little Men and a Farm


I have recently posted videos of other gardeners who transformed their backyard into a Food Forest, which you can see here: Val and Eli and Permaculture Trio. I highly recommend watching those videos because they will allow you to visualize some of the details I have outlined so far.
Another  video I recommend (see below) discusses types/aspects of Permaculture, for example, Hugelkultur, Straw bale, Sheet Mulching, soil/compost bombing, Ruth Stout Method/Composting in Place, and living mulch systems:


As mentioned, recreating a layering system like a Forest provides much more benefits. For example smothering/preventing undesirable weeds and bugs, while retaining moisture and heat, including adding natural nutrition.
This layering (Sheet mulching) system mimics the leaf cover found on forest floors. By layering carbon and nitrogen material and other minerals, you are encouraging better nutrition as well as encouraging worms to thrive. Worms till and fertilize the soil for you.

Hugelkultur
During Fall and Winter, many plants are dying and Trees have overgrown which need to be pruned. Permaculurists call this process "Chop and Drop". If you watch the 'Val and Eli" video I provided in one of the links, you'll see the process of "Chop and Drop".
Any branches from a tree, or weeds, or dying plants can be chopped then used to mulch, giving back nutrition to a Tree or garden. Of course dead logs, sticks, and other plant cuttings can be used to make Hugelkultur beds. As the wood decomposes, the wood will feed and retain moisture for your plants in the dry season.
Also, these Hugelkultur mounds are making use of vertical space which saves garden area for more plants, trees, or bushes.
To see the Hugelkultur beds I started, watch the video here: Practicing Hugelkultur methods.


Another aspect of Permaculture design is diversity. A Forest maintains a wide diversity of plants in close proximity, like a polyculture system. For example, growing a Fruit tree, fruit bush, herb, flower, and Vining plant in a small area. Although in gardening, we tend to plant vegetables uniformly in single rows, like a monoculture of twenty rows of Corn or beans. 

Many Permaculturists avoid tilling and mowing their garden. Not only is the equipment expensive, but also the energy needed to run those machines. It's an expense on your wallet and the environment. It's so easy to be reliant on this society for goods and services, but there has come a time we must create our own energy and abundance.
This method of gardening tends to re-seed itself. Growing fruit trees, fruit bushes, nut trees, herbs, and flowers will come back every year. There is no need in purchasing seeds as long as save seeds from fruits and vegetables to grow the following year. You could also add your food scraps to a compost heap while adding leaves throughout the Fall and Winter, then the seeds will germinate in the Spring and grow throughout the Summer.
As stated earlier, to have a thriving Perennial garden and healthy fruits and vegetables, you must mimic the Layering system like a Forest.
First start by continually adding mulch, compost, carbon and nitrogen material, and rock dust on your garden. Around your Fruit trees and bushes, add mulch, compost, and rock dust to keep the plants thriving-- adding nutrition in your food thus providing you more nutrients. It is no wonder our closest ancestors eat a plant based diet--they are genetically and physiologically meant to eat fruit, but also because these foods re-seed themselves without our assistance. Fruit, nuts, and wild greens are the most natural and ethical diet on the planet. That should be lineage enough to eat raw vegan.

Other aspects of Permaculture include Rainwater Harvesting and Natural building. For rainwater harvesting, dig out a small dip for a pond. With this, you'll be able to water plants all year. Having a pond will also encourage frogs to create a habitat and birds will be encouraged to take baths. Both of which will help you control harmful bugs.
Next, Natural building, refers to Housing built with readily available or recycled materials, specifically natural ingredients such as Clay soil, straw, sand, sod, rocks. A natural housing structure represents the land from which the materials were provided. This type of housing allows you to design with the curvature of the land, or build your house around a tree. These houses are nearly Free.
Cob houses are simply the most beautiful and useful piece of artwork. The picture below is a good example of natural housing made inexpensive, quick, and less materials.


Of course I am not a great resource to explain the details of Permaculture. I am ready to learn and put these practices to the test. After several years of Conventional gardening (i.e. tilling, plowing, shoveling, etc), I am reinventing my garden to create a Food Forest. My vision for the growing spaces I work on, is to continually plant Fruit trees and other Perennial fruits and flowers. You can see my current collection of Fruit trees in the post here Fruit trees and Fruit bushes we are currently growing. My goal is to harvest seed from fruit trees and berries which I will spread all over the yard.
So far I have the typical Fruit trees which you can grow for my area. Considering I live in a cold climate, I intend to invest in other cold tolerant Fruit trees and Fruit bushes like, Mulberries, Gooseberry, Persimmons, Elderberry, Raspberries, Huckleberries, Jostaberry, Currants, Chokeberry, Paw Paw. And I would like to add rare types Tropical fruit that has been bred to be Cold Hardy. I have so far bought Cold Hardy Fig Trees (known as the Chicago Fig), and I am growing Cold Hardy Kiwi vines. Another I would like to invest in is The Russian Pomegranate.

For more information about Permaculture, visit the Permies.com website where you will find an array of information on gardening, homesteading, natural housing, natural heating, frugal living, and more.

If you would like to add anything to this post, please leave a comment below.