Wednesday, December 31, 2014

Mini Greenhouse, What plants to start indoors, & Growing sub tropical fruits in cold climate

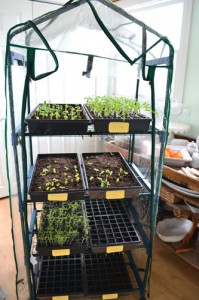
I have bought $75 worth of seeds so far, and I made an investment for a greenhouse. It is a small greenhouse but it will house at least 100 starter plants. The brand of greenhouse is Garden Plus according to Lowes' website: here, but the box reads "Garden Treasures" brand with dimensions of 27 x 19 x 64 inches. The Greenhouse is made with heavy duty plastic sheeting with zipper and wire shelving for air circulation.
With transparent sheeting and a couple of pieces of wood, you could easily make a Mini Greenhouse for $5-10. From Lowes, I spent nearly $40 on this item. Actually, I have mentioned in a previous post how other gardeners have made greenhouses with little materials and little money: Construct a Greenhouse using free materials.
Usually, my home is used as a temporary greenhouse in the Spring season. Unfortunately I run out of space for all my starter plants. I germinate over 500 seeds indoors during Spring. With the Mini greenhouse, I use it indoors which save floor space. The greenhouse will utilize wall (vertical) space, which I can spare--unlike Floor space.
At the beginning of March or end of February, I will start the crops with a long growing season, such as Tomatoes, Cabbage, Beets, Brussels, Carrots, Celery, Collards, Kohlrabi, Leeks, Onions, Parsley, Parsnips, Radish, Rutabaga, Swiss Chard, and Turnips.
As the nights warm (middle of May), I will relocate the greenhouse outside in a sunny location for growing Melons (which have a long growing season). In the Summer, I will put the Greenhouse in a partially shaded location for starting Fall crops to transplant in late summer for a harvest in the Fall & Winter.

In the Winter, I will bring the greenhouse inside to germinate Fruit seeds from Goji berries, Apple seeds, Pear, Peach, Plum, Apricot, Mulberry, gooseberry, and other Cold Hardy Fruits. As an experiment, I have been germinating and successfully started Tangerine and Lemon seeds. Actually the Tangerine and Lemon seeds sprouted while the Apple and Pear have not! Considering I live in a colder climate (Zone 6), I will be growing Tangerine, Lemon, Mandarin Orange, and Banana trees using sophisticated methods: Hugelkultur, Compost heating, Solar greenhouse, and Covering through the winter.
At least two of the Lemon seeds are sprouting, and three of the Tangerine seeds have sprouted and made two leafs. A picture below shows you one of the Tangerine sprouts.

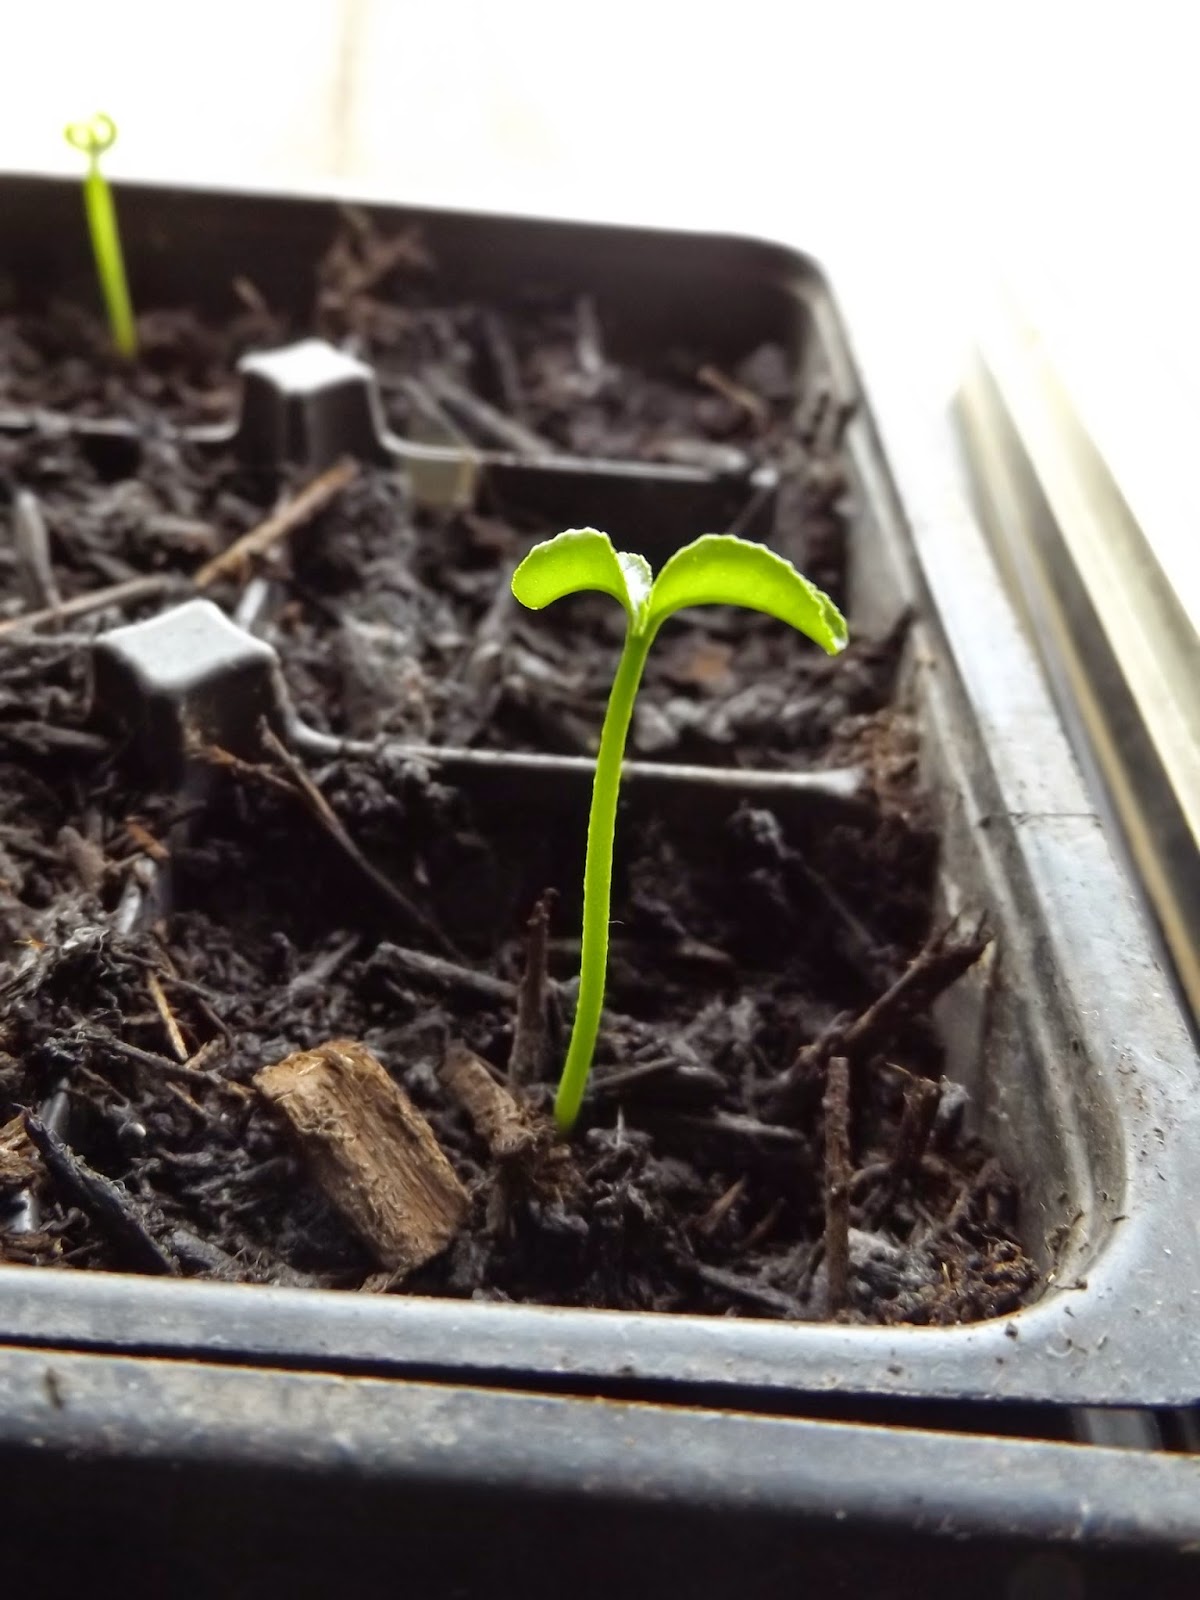
can you tell I upgraded to a new camera with better picture quality? 

I was excited in getting the Greenhouse so I took a picture of my gratitude (in the first picture above). The remaining photos give you a visual of the maximum amount of space that can be utilized in Mini greenhouses...
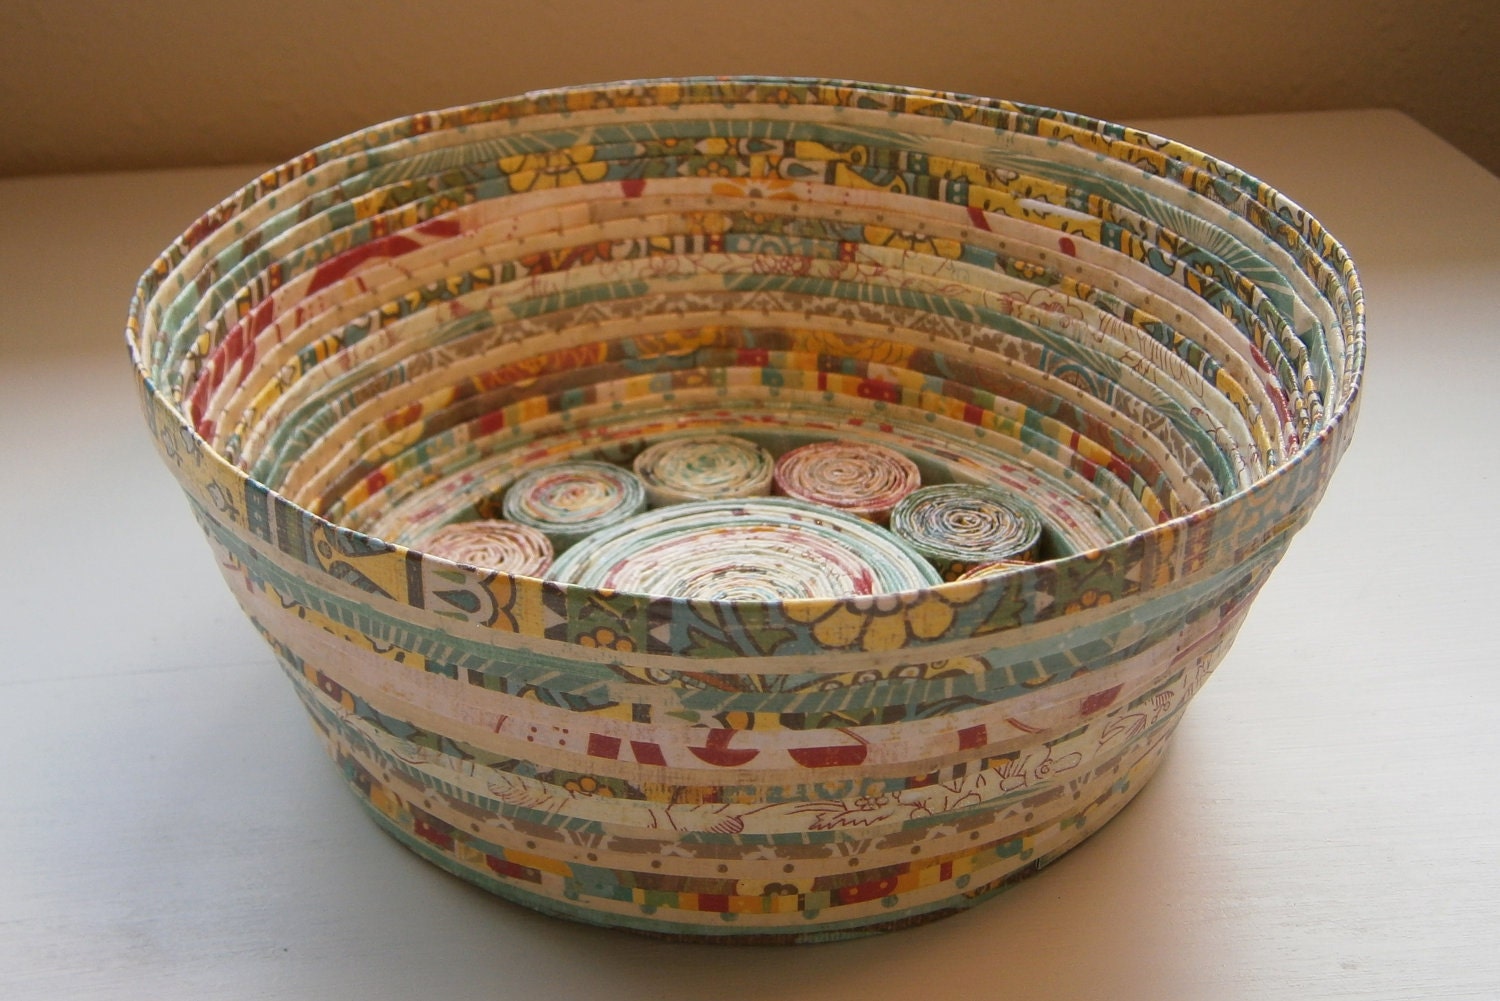
photo source


Tuesday, December 30, 2014

Layout of 2015 Spring, Summer & Fall Garden using polyculture, pest prevention, & companion planting

A few days ago I mentioned in the post "Seeds I bought for 2015 Garden year", I had bought 60 varieties of seeds from Vegan seeds company, as well as Luffa seeds, Goji berry seeds, and Dinosaur seeds. 
With the seeds I purchased, I divided up the Seeds for Spring & fall and the Seeds for Summer. Then I made a layout of where I want these seeds planted. So with my sunniest garden I will be planting cold crops in the Spring and Fall, and plant cold crops in my shady garden in the Summer. And in the summer, I will plant heat/sun loving crops in my sunny garden. 

I have three large gardens that span over 50 feet. My other gardens include raised beds, compost heaps, fruit trees and bushes, and patches where I have tilled around the yard. I'll only be focusing on the Layouts of 2 of the 3 Main Gardens. Last year I grew 9 rows of Corn, 4 rows of beans, and 9 rows of Melons in my third Main garden, but I plan to do something different in 2015. As for the other two garden layouts I'm showing you below, I may make alterations, because what I grow will depend how much of each seed can be squeezed into the gardens. 
In the first photo, I show you my first Garden which is made up of rows of Hugelkultur mounds. This garden gets more sunlight year round compared to my other two gardens. This is where I grow tomatoes and peppers and sun loving fruits. In the Spring and Fall, this garden is where I will grow cold tolerant crops. This garden will focus on growing a variety of Herbs, Root crops, melons, Tomatoes, and Peppers, In the shady spots of this garden, I will place the Broccoli, cabbage, collards, and lettuce. 
You may notice where I have grown the Broccoli, Cabbage, Collards, and Brussels, I have also decided to plant herbs that will prevent pests, such as Sage, Chives, Rosemary, Garlic, Cilantro, Lavender, Basil, and onion. This polyculture design you see in the first photo creates a Unique look to a variety of plants which will prevent many pests from eating your food while attracting 
Also, keep in mind companion plants such as Tomato and Basil which grow well together. 


The second photo shows you Garden 2 of 3. This is my Grandparents' backyard that receives partial sun. This garden is perfect for growing Shade and cold crops in the Summer. Here I grow potatoes, corn, beans, and Squash. I will be using the Three Sisters method for the Corn, beans, and squash and try to keep them away from the potato garden. Apparently growing potatoes near squash inhibits growth. 


Thursday, December 25, 2014

Seeds I bought for 2015 Garden year

Thanks to generous donations from family members, we were able to purchase seeds for the upcoming garden year. We were able to buy 60 varieties of seeds from Veganseeds company, 10 Luffa seeds, 1000 Goji berry seeds, and 50 Dino Kale seeds.

From Veganseeds company, I bought "Emergency Seed Vault - 60 varieties of seeds" (non-gmo, non-hybrid, Heirloom, Vegan seeds). The Seed Vault included different types of Tomatoes, Beans, Melons, peppers, and Squash. Unique seeds added to the Seed Vault were Asparagus, Kohlrabi, Cauliflower, Anise, Echinacea, Swiss Chard, Arugula, Rutabaga.


We bought the Luffa seeds on amazon at "Luffa Bathroom Sponge 10 Seeds - Gourds!". Luffas are fibrous internal structure of the gourd that converts into sponges after 12 inches long. They climb or spread just like cucumbers and need very similar growing treatment. They can be eaten like a cucumber, and you can dry them to make loofah bathroom sponges. When ripe, leave in a dry place, and the outer skin will come away revealing the loofah beneath. Wash them in mild disinfectant and place in a warm place to dry completely.

Harvest when 6" long for eating. They are slow to grow, and it is best to start indoors according to gardeners. 
photo source from a Japanese lifestyle for every culture

 From Asklepios-seeds we bought 1000 seeds of Goji Berries from: 1000 seeds of Lycium barbarum, Goji-Berry, Wolfberry, Boxthorn, HIGH YIELD STRAIN.  


From Botanical Interests, I bought the "Kale Italian Lacinato Nero Toscana Certified Organic Seeds" also known as Dinosaur kale. 


The following photos show you the collection of Organic & Non-gmo Seeds I currently have:


The list of seeds include: 
1. Rutgers TOMATO (1,000 SEEDS) 2. Blue Lake Snap Bean great flavor (200 ) 3. Dark Red Kidney Bean (200 seeds) 4. Butter crunch Lettuce (44,000+ seeds) 5. GREEN Broccoli (1,150seeds) 6. CABBAGE ALL SEASON (1,100 seeds) 7. SCARLET NANTES CARROT very tasty (26,000 seeds) 8. Corn (truckers favorite) (150 seeds) 9. CANTALOUPE HALES BEST JUMBO (250 seeds) 10. Market more Cucumber (500 seeds) 11. Ashley Cucumber tasty (500 seeds) 12. Eggplant black beauty (150 ) 13. Cherry Belle Radish (550 seeds)salad favorite 14. Spinach Bloomsdale (550+plus seeds) 15. California Wonder Bell Pepper (150+plus seeds) 16. Jalapeno Pepper (150) 17 Watermelon (75seeds) 18. Yellow Crookneck Squash (85 seeds) 19. Zucchini Black Beauty (75 seeds) 20. Long Red Cayenne Pepper (150 seeds) 21. ONION (100seeds) 22. Dark Red Beet (150+plus seeds) Great Taste 23. Henderson Lima Beans (150+plus seeds) 24. Sunflower Seeds (2050+plus seeds) 25. BEEFSTEAK TOMATO (1000 seeds) 26. TURNIP SEVEN TOP TURNIP GREENS (36500 seeds) 27. COLLARDS GEORGIA SOUTHERN COLLARD GREENS (36500 seeds) 28. CELERY (23,000 SEEDS) 29. PUMPKIN (50 SEEDS) 30. BRUSSELS SPROUTS (100 seeds) 31. COWPEAS (50 seeds) Black eyed peas 32. GREEN PEAS (30 SEEDS) 33. CILANTRO (50 seeds) 34. ANISE 50 seeds 35. BASIL 50 seeds 36. CATNIP 50 seeds 37. CHAMOMILE .45gm 38. CHIVES .7gm 39. ECHINACEA 20 seeds 40. FENUGREEK 30 seeds 41. OREGANO .5gm 42. SAGE 50 seeds 43. WHEAT Spring Wheat (100 seeds) 44. CAULIFLOWER (100 seeds) snowball 45. OKRA (40 SEEDS) Clemson Spineless 46. PARSLEY (100 seeds) Italian 47. ROMA TOMATO (100 SEEDS) 48. MANALUCIE TOMATO (150 seeds) 49. Bantam Yellow sweet corn ( 130 seeds) 50. BUTTERNUT SQUASH (50 Seeds) 51. SWISS CHARD (50 seeds) 52. ENDIVE (50 seeds) 53. PINTO BEANS (30 seeds) 54. TOMATO CHERRY (125 seeds) 55. Mustard greens (100) 56. Asparagus (40) 57. Arugula (100) 58. Turnip purple top (100) 59. Kohlrabi (50) 60. Kale (50) 61. Dill (50) 62. Rutabaga (50)

Luffa seeds (10)
Goji berry (1000)
Butternut squash other (400+)
Dino kale (50)
Spaghetti Squash (100)
Acorn Squash (300)
Sweet marjoram (100)
Summer Savory (50)
Spearmint (50)
Rosemary (20)
Garlic Chives (40)
Thyme (50+)
Basil Italian, Lemon, Dark Opal, Cinnamon (40)
Watercress (100+)
Broadleaf Sage (18)
Sweet Banana pepper (30+)
Lavendar (50+)
Early Prolific Straightneck Squash (50)


Tuesday, December 23, 2014

Pale blue dot by Carl Sagan

“Look again at that dot. That's here. That's home. That's us. On it everyone you love, everyone you know, everyone you ever heard of, every human being who ever was, lived out their lives. The aggregate of our joy and suffering, thousands of confident religions, ideologies, and economic doctrines, every hunter and forager, every hero and coward, every creator and destroyer of civilization, every king and peasant, every young couple in love, every mother and father, hopeful child, inventor and explorer, every teacher of morals, every corrupt politician, every "superstar," every "supreme leader," every saint and sinner in the history of our species lived there-on a mote of dust suspended in a sunbeam. 

The Earth is a very small stage in a vast cosmic arena. Think of the endless cruelties visited by the inhabitants of one corner of this pixel on the scarcely distinguishable inhabitants of some other corner, how frequent their misunderstandings, how eager they are to kill one another, how fervent their hatreds. Think of the rivers of blood spilled by all those generals and emperors so that, in glory and triumph, they could become the momentary masters of a fraction of a dot. 

Our posturings, our imagined self-importance, the delusion that we have some privileged position in the Universe, are challenged by this point of pale light. Our planet is a lonely speck in the great enveloping cosmic dark. In our obscurity, in all this vastness, there is no hint that help will come from elsewhere to save us from ourselves. 

The Earth is the only world known so far to harbor life. There is nowhere else, at least in the near future, to which our species could migrate. Visit, yes. Settle, not yet. Like it or not, for the moment the Earth is where we make our stand. 

It has been said that astronomy is a humbling and character-building experience. There is perhaps no better demonstration of the folly of human conceits than this distant image of our tiny world. To me, it underscores our responsibility to deal more kindly with one another, and to preserve and cherish the pale blue dot, the only home we've ever known.” 

Thursday, December 18, 2014

TINY Cob home layout

The first photo is a doodle we drew up. The cob home takes the shape of a spiral, similar to a sea shell or snail shell. I'm still unsure of the window facing North East. This is where the sun starts to rise, but I have heard from other cob builders that you'll lose heat having windows facing North East. I am definite on small windows in the South East and West, and a large window facing South.

As of now, the trench spans 26 foot wide and 26 foot in length. I'm not too certain it's that length and width because I was using my foot to estimate, since their around 10 inches. I'll get exact measurements later....
There will be 2 foot of cob walls on the outside. The entrance will be about three foot wide, depending on the door we find. The living space will be an open concept (with the kitchen counter, couch, and stove), spanning 8-10 feet in length and less than 22 feet wide. The bedroom will be surrounded by 2 foot wide cob wall spiraling inwards creating a nook. The length of the bedroom comes to 17 foot and the width of the bed about 8 foot.
Most likely, the measurements are off, especially considering I was using my feet as measurement. Since writing this post, I have already dug the trench deeper, as well expanding the house another 4 feet.
On a piece of paper, you don't realize how small this house will be until you look at the photos I posted below. Already, we have dug out the trench, which we will be digging deeper about a foot or two. Really the trench I dug is a visual of the shape of the house.

I need to save up money for a small stove to heat the house, which will have a pipe going up the wall out of the roof. In the sketch below, I have the stove up against the wall facing the living space. The wall behind the stove will release heat in the night, making our bedroom warm and cozy.


In the following photos you'll notice a trench in the shape of a half circle. Also notice the four sticks marking the entrance of the house, and one of the sticks represents the wall extending in the house creating the wall for our bedroom.
The square sheet of plastic, you see in the photos, represent the living space where the couch and stove will be placed.


My vision for the home will look similar to Ziggy and April's creation, seen below. Their home was small but efficiently designed to save space. The picture here is the outside, and the second picture is a panoramic of the interior.


I have videos discussing my process for outlining the home and digging the trench here: Digging outline/trench for cob home (video). Also, I have other posts on the topic of cob homes. For more details on cob homes and building houses for free and with all natural materials, click the links here: Constructing our own home: cob building, homesteading, & free materials and COB BUILDING (Straw, clay, & Sand for building DREAM EARTH HOME

Again, I understand that this is an incredibly TINY home to some people. I grew up in a trailer and a small house with five other people. I usually shared beds and slept on floors. I am used to living in a small conditions. I do not intend to have a shower or toilet in the house either. My only intention with this home is to have somewhere to sleep warmly at night and store food and books.

It's actually liberating to live in a small home because you understand what's most valuable in the home. Possessions are overrated and too many possessions causes a feeling of "weighed" down or you feel like you could never pack up and leave. You'll always worry if someone will rob you of your stuff as well.

7 Free last-minute holiday gifts & Crafts

Citrus and apples are in season, of course I have been buying them every week.

Instead of discarding orange peels, I have been drying them for POTPOURRI. I hate the holidays, but I always try to make crafts (free gifts) for family members since they give me gifts. Normally I eat the peels of apples, but I'm going to start saving them to dry and add to the containers of potpourri. Actually the jars I'm using were found from the woods.
This last week I've been eating Mint and vanilla bean in my smoothies, so I've saved the stems of Mint and pod of vanilla for making potpourri. I have a variety of scents I'm going for, so one of the jars will contain Orange peels, mint, and vanilla pod. Then another will have Orange peels, apple peels, and cinnamon sticks.
For a fresh Pine smell, I go to my Pine trees to pick off needles and pine cones. A different jar will contain bits of Pine cones, pine needles, and other earthy or woody materials. For example, I just-so-happened to have a piece of cedar, so James shaved curly pieces of cedar to add to the jar of Pine cones/needles.
I have a Maple tree dropping limbs, so I collect the twigs of Maple--which have small red buds during the winter. With the Maple twigs, Pine cones, pine needles, cedar shavings collected in a jar, it embodies or captures the essence of Fall and winter.
Instead of putting a lid on the jars, I have taken a piece of fabric to cover the top of the lid, then placed a rubber band around the top to hold fabric in place.

Here are some of the combinations you can work with:
Jar #1: Pine cones, pine needles, cedar shavings, maple buds, Sumac seed pods, and various Fall & winter fragrances/materials.
Jar #2: Orange peels, dried mint and other herbs, vanilla bean pods.
Jar #3: Orange peels, apple peels, cinnamon sticks, and other spices.
Jar #4: Special rocks you have found.
Jars of potpourri

Pine cones, pine needles, cedar shavings, Sumac seed pods, and maple buds


All jars seen in the photos were found in the woods. So all the materials except the fabric were "free". The other jars I found in the woods--extra small or extra large bottles--were used for a different project. Instead, I painted one bright yellow with red and orange squares around the base and neck of the jar. This jar is used for a lantern. I may not give this away as a gift.

I painted another jar with flowers and bees. As mentioned, you can make a jar filled with "special rocks" which I may do for this particular jar, seen below.


Instead of using the jars for painting and potpourri, you could make Homemade bath soaps and scrubs, or bath salts as well. One Foot Scrub (or facial scrub) I would make would be using Brown Sugar, Lemon Juice, Aloe Vera, Coconut oil. Then put mixture in a jar.
A dried toothpaste to package would be a mixture of baking soda and cinnamon.
An Oatmeal Bath could include a Jar of Rolled oats, baking soda, cinnamon, and vanilla extract.


Another idea is to make a Paper sack basket, which you can find tutorials on youtube. In fact you could make a basket out of newspaper even and fill it with your homemade Soaps and scrubs, or other hand crafted items.


Other gifts I created were painting rocks. One rock was painted with my dad and his wife's name with flowers and bees. A smooth and small rock was painted with a cat's face. I really enjoy looking at others' rock painting creations, so I have posted a few pictures of other people's creations including my own.
If you intend to place these rocks outside, I recommend using Outdoor Spray paint with primer and Acrylic clear coat spray. 


Of course a painting on canvas is highly respected and valued. I give a way a couple of paintings every year. So far I've made a painting of yellow flowers (Tickseed Sunflowers) seen below. I will give this to one of my Grandmothers. I made her a small painting last year of a tiny bird, which you can see here: December 2013 Painting of Bird.

painting gift

Another great gift is to give someone a House plant or fruiting tree. I grow about five Aloe Vera plants in my house, so the "pups" or Aloe babies can be transplanted into a small container and given as a gift.

Aloe pup as gift
These creations can be given as birthday presents or a sign of gratitude. Creating your own gifts shows thought and dedication while a card or something you purchased may seem thoughtless. Plus,  I hate the idea of supporting corporations to give a gift that represents American consumerism based around a Pagan holiday turned religious. Muhaha!

Friday, December 12, 2014

Self seeding & Perennial Garden, James Prigoni's Permaculture Food Forest

Recently I have discovered knowledgeable and skilled gardener, James Prigoni of Jersey. James uses Hugelkultur and Permaculture gardening methods--meaning he does not till his garden, rarely waters, and frequently mulches. His garden is like walking through a thicket of food. His garden goes from bare dirt to abundance in 92 days. In the videos below, James explains his process and inspires by taking you on a tour of his self-seeding, self-sustaining food production, and I highly recommend watching all the videos below:


Wednesday, December 10, 2014

Edible Landcaping: All About Perennials (Flowers, herbs, & food)


photo source: Gardening Forums
"Some perennial trees can live for thousands of years, while other plants, like lavender, live closer to 10" (SF Gate). Types of Perennials include (1) evergreen perennials like Begonia and banana; (2) deciduous perennials like the goldenrod and mint; (3) monocarpic perennials for example Agave and some species of Streptocarpus; (4) woody perennials such as maple, pine, apple trees; and (5) herbaceous perennials such as alfalfa, wheat grass, and Red clover.

The term Perennial is used to differentiate annuals and biennials which are shorter-lived plants. Small flowering (herbaceous) perennial plants die back every autumn and winter, then return in the spring from their root-stock. Through a form of vegetative reproduction rather than seeding, Perennials typically grow structures (bulbs, tubers, rhizomes) that allow them to adapt and survive periods of dormancy over cold or dry seasons during the year.
"Perennial plants can be short-lived (only a few years) or they can be long-lived, as are some woody plants like trees. They include a wide assortment of plant groups from ferns and liverworts to the highly diverse flowering plants like orchids and grasses"(Perennial Plants). For example, Tomato vines live several years in their natural tropical/subtropical habitat but are grown as "annuals" in temperate regions because they don't survive the winter.  
Perennial plants are usually better competitors than annual plants (especially if growing in poor conditions), because their larger root systems will access water and soil nutrients deeper in the soil--why is why Perennial plants and trees dominate many natural ecosystems on land and in fresh water. In nature with other wild animals, we would be relying on Perennial fruit and nut trees, perennials flowers and herbs for food.

photo source


Generally gardeners want to grow Perennials in an effort to grow higher yields of food, and spend no time tilling, or re-planting next year. However, I suggest to continue to re-growing (or Propagating) perennials through dividing or cuttings. This will allow you to increase the number of plants in your garden without purchasing from a big-box-store. 
 "Once the plant's root structure is large enough, you can simply divide it into separate clumps and transplant...In late fall, follow these simple steps:
Determine whether the perennial should be divided: Check out the crown of the plant, which sits right at the soil's surface. If there are multiple crowns where leaves are growing, the plant is ready to divide.
Remove the plant from the soil: Use a shovel to dig around the plant and loosen it from the soil.
Root division: To avoid damaging roots, use a small garden fork to gently untangle the root structure into two clumps. Depending on how big the root structure is, you can continue to divide into smaller clumps.
Transplant: Replant the clumps into the soil, making sure to give each plant enough space to grow. This will depend on how large the expected root structure is - ask your local gardening store if you're unsure. Cover with soil, water and make sure the soil is moist throughout the winter. With luck, the rains should take care of that" (SF Gate). 
Besides dividing plants, gardeners also root plants from cuttings. For example, "Cleanly cut a stem about 3 inches in length off of the plant, at a diagonal and above a node. Remove any leaves so that energy can be redirected into growing roots.
Encourage root growth: Cover the end with a root hormone powder (check your local gardening store) or a natural root stimulant.
Keep moist and warm: If left out in the air, the cutting will dehydrate and shrivel quickly. Dig a wide hole in moist soil, to ensure that the root powder does not scrape off the sides of the cutting as you place it in. Fill in with soil and keep well watered, well drained and warm.
Tug: To determine if the plant is ready to be transplanted into your garden, pull on it. If it pulls back - this time varies from plant to plant, but anywhere from one to four weeks later - you're good to go" (SF Gate). 

photo source: Edible landscaping

According to Becca Badgett, gardeners should choose to grow "delicate and frilly flowers when choosing hardy perennial plants that are members of the Dianthus family, such as Sweet William and carnations. The herb yarrow provides frilly foliage and delicate blooms when used for cold climate gardening" (GardeningKnowHow). Becca Badgett also suggests growing Perennial plants from shortest to tallest around the borders of your home or yard (like in the picture below).
source: Small Yard Landscaping Ideas

For example, plant  your taller plant in the back, like the Foxglove, Bugbane, Meadowsweet, Sneezeweed; and Echinacea, Delphinium, Aster, Chrysanthemum, False indigo, Tickseed, Bleeding heart, and Globe thistle. Shorter plants for the front of the garden include: Ajuga, Spurge, Sea thrift, and Wormwood.

Here I have provided a list of Common Perennial food, trees and flowers that grow in almost any region:

Wild edibles with Sergei Boutenko

Herbs &Vegetables

Alfalfa
Asparagus
Caucasian Spinach  
Fennel
Garlic Chives
Ginger
Good King Henry
Groundnut
Ramps (Wild Leeks)
Rhubarb 

Scallions
Sorrel
Sunchokes
 Sylvetta
Thyme
Watercress 

photo source
Fruit & Nut Trees

 Apples
Apricot
Beech nut 
Blackberry
Blueberries
Cape gooseberries
Cherries 
Gooseberries
Grapes
Hickory nut
Paw paw
PeachesPears
Plums
Raspberries
Strawberries 
Walnut


photo source
Flowers

African lily
 Bee Balm
 Bleeding Heart
 Canna lily
 Chrysanthemums  
Common thrift
Daffodil
  Dahlia 
Day lilies
 Echinacea
Hosta

Goldenrods
 Hellebore  
Larkspur 
 Monkshood
Peony
Queen-of-the-prairie 
 Spiderwort
Summer daisy
Solomon's Seal
 Virginia bluebell
Zinnia


If you read my post "List of Shade & Cold tolerant plants" from weeks ago, some of the names of Flowers and vegetables may sound familiar. Many of the shade and cold tolerant flowers and vegetables I listed in that post were Perennial plants. For example, Ferns, Hostas, Bee Balm, Viola, Solomon's Seal are Perennial plants that tolerate shade and cold climates. 
Some of the Flowers I listed above are growing in my Grandmother's Perennial Flower garden.  She grows Bee Balm, Butterfly bush, Tulips, Phlox, Iris, Dahlia, and Yarrow. These flowers are cold hardy, growing in Zone 6 (my region) and as cold as USDA Zone 3. I have taken many photos of her flowers, which you can see in this post: Floral Photography 2014.
 
Edible Landscape Design made an Extended list of other Perennial fruit trees and vegetables I did not mention, which you can see here: A list of Perennials to Get You Started. I highly recommend reading my Extensive list of Uncommon Fruit trees and fruit bushes because it provides a list of Cold Hardy Perennial Foods for Edible Landscaping. Click the link to the article and read how to grow each of these Fruits: List of Uncommon Cold Hardy Fruit Trees (Gardening Zones 3-7).


References from GardenGuides, SF Gate, GardeningKnowHow and Permaculture Research Institute.

Monday, December 8, 2014

Garden expansion through Hugelkultur (part 2)

The Hugelkultur beds are assembling quickly now that I have help from James. He has been placing smaller pieces of log that will decay sooner into small Hugel beds (which will decay over 2-3 years); and rearranging the larger pieces of log to the larger Hugelkultur mound (which will decay over 3+ years).
Below, I show step by step pictures so that you get a visual understanding of my process...

In the first photo is the Hugel bed in front of my house. First I lay cardboard on the ground, then large pieces of logs or limbs, then twigs/sticks, leaves, then topped with seven inches of black natural mulch.


In this photo I have pieced together my process with three rows of Hugelkultur mounds. You see that I have placed the logs first, then sticks, then leaves, then dirt on top. 


The next three photos show a large Hugelkultur bed. The particular large mound was dug a foot deep into the ground, then we puzzle-pieced the large chunks of log into the pit, added sticks and twigs, then added leaves. The dirt dug from the pit then will be layered on top of the leaves, which we did for the other Hugelkultur beds.


I have a video below that shows you the step by step process for the large Hugelkultur bed with the large pieces of logs.  Also in the video I give you a tour of the other Hugel beds in the garden. Watch video posted below:


Saturday, December 6, 2014

Lifestraw water filter product review

LifeStraw is a water filter designed to be used by one person to filter water so that they may safely drink it. It filters a maximum of 1000 litres of water, enough for one person for one year. It removes almost all of waterborne bacteria and parasites and nearly all microbes.


I used the Lifestraw when camping at Lake Placid, Paris Mtn State Park South Carolina, and also when camping in the woods behind my house. For example, the last time I went camping, I came across a pond which I drank from using the Lifestraw. The water tasted clean and appeared clear, and I had no reactions to drinking the water. I mention this in the video I have posted below. Watch the video for more information and facts about the product.


Tuesday, December 2, 2014

Indoor Growing / Propagation of Cuttings, Prunings & Food Scraps

Obviously when we purchase food from a store or Farmer, we can save seeds from apples, pears, avocado, lemons, and others to plant in a pot and grow outside. Most fruits purchased from the store came from grafted trees, meaning the tree may have different varieties growing on them. Thus, the fruit you ate may not be the same variety, taste, shape that you grow.
 Of course I still sprout fruit seeds I have saved from store-bought fruits, because I am experimenting with re-growing FREE food. But when it comes to re-growing your food scraps (the ends of celery or lettuce) will continue to root and grow food within weeks.
As seen in the demonstration below, First put cuttings in water next to a sunny window, then move to a pot of soil to continue to root. This method is a Simple strategy to growing FREE food.


source: cooking stoned
From my experience, carrots are useless to re-grow because you would only be growing them for the carrot greens. However, you can certainly put carrot tops in the ground to re-grow a full-sized carrot. Also from experience, green onions take three days to re-grow full size (and ready to harvest). Re-growing lettuce takes a month, but will produce fresh leaves within a week. You can re-grow Cilantro, basil, or possibly any herb using this method. Even Button mushrooms from the store can be re-grown, for example: "Plant mushroom stalks in soil with some compost or used coffee grounds and keep them in a moist environment, preferably where it will be cool at night. They can be tricky to grow, and within a few days the stems will either start to sprout new heads or rot" (Food Hacks).

source: cooking stoned


Other people have used this method of re-growing food, look at the pictures below for inspiration...

photo source: True Activist

Source: Eating the Week
photo source
photo: Garden4Goodies
Do not limit yourself to re-growing vegetables alone: Cuttings from Fruit trees can also be rooted with this method, known as Propagation. Once or twice a year, Fruit trees will need to be pruned (in Spring or Fall). By taking the cuttings ("prunings") and placing them in water, the tree will root at the ends, then place the tree in a pot of soil. Growing trees in a pot should be temporary so you can monitor the soil conditions, moisture, and temperature. In April through Summer months, transplant Fruit tree from the pot to a place in your yard (garden). Continue to water tree every other day for a successful transplant. If pruning trees in the Fall, place Tree cuttings in the fridge to stay dormant or transplant to a pot of soil indoors over the winter.
photo source: Mulberrytrees

Many vegetables can be grown from food scraps, and many of these can be grown successfully in containers so There is no need to have an outdoor garden to transplant your cuttings from the cups of water (but I highly recommend it!)
Please refer to my post on Fruit trees and vegetables that can be grown in Containers: Grow Veggies & Fruit trees in Containers (Limited Space & Urban gardening)