The video below presents Paul Gautschi's Back to Eden garden. Paul uses Permaculture methods where wood chips, leaves, and compost are layered which decompose into nutrient rich soil. I particularly favor Paul's ideals on school ruining our education and how to grow gardens. Another thing he mentioned which I agree with, was that we were physiologically designed to eat raw, fresh, ripe, seasonal fruits and vegetables (not cooked or dead food). I have heard him say that he eats turkey and lamb during the holidays, however.
You'll find that Paul also has goats and chickens for garden purposes,
but I am against having (owning/using) animals, so I am not advocating these methods. I also disagree with his archaic language of a "Creator". It seems Paul confuses Natural phenomenon with an Intelligent Creator; and in the video below you'll get a mouthful of religious philosophy; but all that can be ignored, because he has a great personality and he himself is an intelligent man with a beautiful garden and Fruit Orchard.
Paul has an astounding production of food and all of his food grows faster, more abundant than conventional food. I was truly amazed by the sight of his gardens. This man has great wisdom, and I recommend watching the video below to full extent. He shows you how to avoid tilling, avoid weeding, and dispels myths about gardening saying "Everything we know about gardening is a lie".
For over a month now I have collected logs, limbs, and leaves from the woods. I am slow to haul logs through the woods to my house because some weigh as much as 100 pounds. I usually roll the large pieces of log, and carry the logs that weigh less than 50 pounds. Some of the logs that weigh between 50-100 pounds are the ones I drag with a rope. Most of the wood and other tree matter is easy to collect because it's not far from my house, but that means carrying heavy logs for several hundred yards.
James has busted up some of the large pieces of tree. Larger pieces cover the bottom of the Hugelkultur mound, then limbs/branches/twigs are placed in the middle, then leaves are spread over top of the mound. The leaves will trap heat while the logs and sticks retain moisture. Over time the leaves decay over the rotting logs and become rich dirt like the ground floor of a forest. I find this method to be the most rewarding, beneficial, and efficient way to grow food.
Our experiment has been placing logs/leaves in the walkways of our Summer's Tomato garden. Considering we had 10 double rows of Tomatoes, we have made 12 Hugelkultur beds within our garden.
Attached to our Summer's Tomato garden was at least 5 rows of Pepper plants, which we have mulched with pine needles and leaves; but I doubt we turn this portion of the garden into a Hugel bed because it will be too close to the Cob home we're building within the Garden. I posted a video of the Hugelkultur mounds along with the Cob home trench in the video below. The video was from a couple of days ago when I had not added three additional rows of Logs, but you can see the photos afterwards of the progress so far. I will have an updated video soon so that you can get the "full experience" of the Hugel garden.
As mentioned, there are 10+ rows of logs and tree matter. In the photo below are the first Four rows which contain long thin logs.
The photo below shows you the following Four rows covered in leaves. These four rows are the Middle rows, which are nearly completed, while the other rows contain only large chunks of logs.
In the next two photo are three rows with large pieces of logs.
The photo below shows you the last couple of rows.
Yesterday I collected the three logs you see in the photo below. Essentially, I rolled each of them from the woods to my house. The biggest chunk was nearly 100 pounds and the other two were 60-70 pounds. James then busted the logs into smaller pieces, which will allow them to decompose much faster.
It's difficult to show you the entire garden in one frame, which is why I highly recommend watching my videos that I post on Youtube. The goal here is to transform the 13 rows into 13 Hugelkultur mounds. Once we limbs/branches/twigs/leaves over the logs, we will then add mulch/dirt/compost and other material which will help quickly break down tree matter into soil.
One other Hugel bed I am working on is seen in the next two pictures. The bed is approximately 3 ft wide, 3 ft tall, and 15 ft long. Weeks ago I began placing long, thin logs at the bottom of the bed, then sticks, twigs, then leaves. After several layers of leaves, I added Natural black mulch on top.
Yesterday I harvested several handfuls of jalapeno peppers and other peppers. They produced better than any other plant in my garden. It's a shame Jalapenos grow so well for so long, because I usually don't know what to do with them upon eating. Occasionally I'll cut up three jalapeno peppers with tomatoes, corn, other peppers, and onion, steam veggies, then serve over black beans and rice.
Considering we have so many jalapeno peppers, banana peppers, and hot peppers, my partner wants to pickle them or make a jam. The only peppers I can tolerate to eat are the Sweet varieties.
I have harvested banana and green peppers yesterday as well. In the
photo below are the varieties of peppers, a tomato, and large and small
purple turnip. The turnip seeds were grown from non-GMO Veganseeds company.
October 19th garden harvest
Purple turnip
During August to June the garden harvest is much more plentiful, harvesting up to 20 lb of food everyday. I will soon compile the pictures of my garden harvests and calculate how much food I produced within the last six months of growing. My prediction so far is that I have harvested under $1000 worth of food, but then again I grew over $1300 worth of food last year in the garden.
The peppers have been producing everyday, so we usually harvest them everyday. Here are a few photos of the banana, jalapeno, Cowhorn, and Cubanelle peppers along with Green peppers, potatoes, lettuce, kale, tomatoes, dill, and persimmons I have harvested in September through October:
10-22-14 lettuce & dill harvest
10-22-14 tomato harvest
10-30-14 Pepper Harvest
October 20th garden harvest, greens & peppers
October 16th garden harvest, peppers and tomatoes
October 11th harvest, potatoes and peppers
In the following two photos are two varieties of Persimmons. One has the taste of Pumpkin pie and the other taste like Orange flavored Icy-pops.
October 17th persimmon forage
October 7th persimmon forage
October 8th Lettuce, Kale, dill, tomato harvest
October 7th harvest, Yellow watermelon
September 2nd, Peppers/tomatoes/squash/melon harvest
September 15th, Pepper and tomato harvest
September 20th Watermelon harvest (not ripe)
September 15th potato harvest
September 2014, Pumpkin harvest
September 13th, Strawberry harvest
September 15th strawberry harvest
September 15th, Peaches harvested from our tree / Cantaloupe & watermelon (not ripe) harvested from the garden
I don't usually grow food in containers because I focus on growing in permanent locations. However several years ago I had found several 5 gallon buckets in the woods, and decided to grow Tomatoes in them. The tomatoes were Volunteers from the compost pile. We were happy to find out that they were Grape tomatoes which Flower early in the Summer season and continue to grow later in the Fall and winter season.
"tomato from compost pile"
Last year I grew vibrantly green and succulent leafs of Lettuce in large pot of leaf matter and Compost (Seen in the photo below). This container of Lettuce was started in August (2013) and I was able to harvest from them up until mid-November.
I don't remember why I transplanted the Jalapeno pepper to a Container (in the photo below), but obviously in a medium-sized container, at least one pepper plant can flourish and produce many peppers for months!
Jalapeno pepper plant (2013)
For those renting a home, apartment, or for those with limited space, have the ability to grow food in a container garden. Re-purposing food containers, buckets, and plastic bottles allows you to grow food for little to no money; and this process keeps your trash out of the landfill (no garbage payment either!)
When you purchase fruits and vegetables from the farmer's market or grocery store, you will be able to save seed, cuttings, or roots from your foods to re-plant. Celery, radishes, onions, potatoes, lettuce, and even pineapple scraps can be grown from the parts you would usually discard into the compost. And of course all of these foods can be grown in containers! Surprisingly, potatoes can be grown in a small confined space.
There are a plethora of container gardening systems and designs. Last week I posted a video on Growing Food in small raised beds from OneYardRevolution: How to grow food in a small space. In a much older blog post, I made little effort in demonstrating ways of growing food in limited spaces, thus I wanted to revisit container gardening in more detail now. In the older post, I mentioned using Terrariums, Vertical structures, and Containers to grow food in temporary living situations, which you can see here: Three ways to grow food & Other plants for Apart Dwellers (Indoors/Outdoors).
Many apartment dwellers grow food on a patio, along the steps, or inside the home next to a South-facing window. Mike Lieberman was a great example of Urban gardening, as he grew his vegetables on his NYC fire escape. He has many YT videos on how to grow food in buckets, pop bottles, and other great apartment gardening tips. His most popular YT videos included:How To Make A Self-Watering Container Using 2 Container, and a tour of his Urban Gardening in Small Spaces.
Some of the most impressive Vertical/Micro gardening methods include hydroponic and aeroponics systems. In the video below, a Wisconsin couple grow vibrant and healthy tomatoes, peppers, and cucumbers, in the Winter time using containers and aeroponic systems. The Wisconsin couple prove it is possible to grow
vibrant plants in a limited space with small containers-- even in the
Winter, and without soil! The couple's main focus is providing light, and a mist mixed with a mineral-rich solution. And you can completely run your system off of rain water collected:
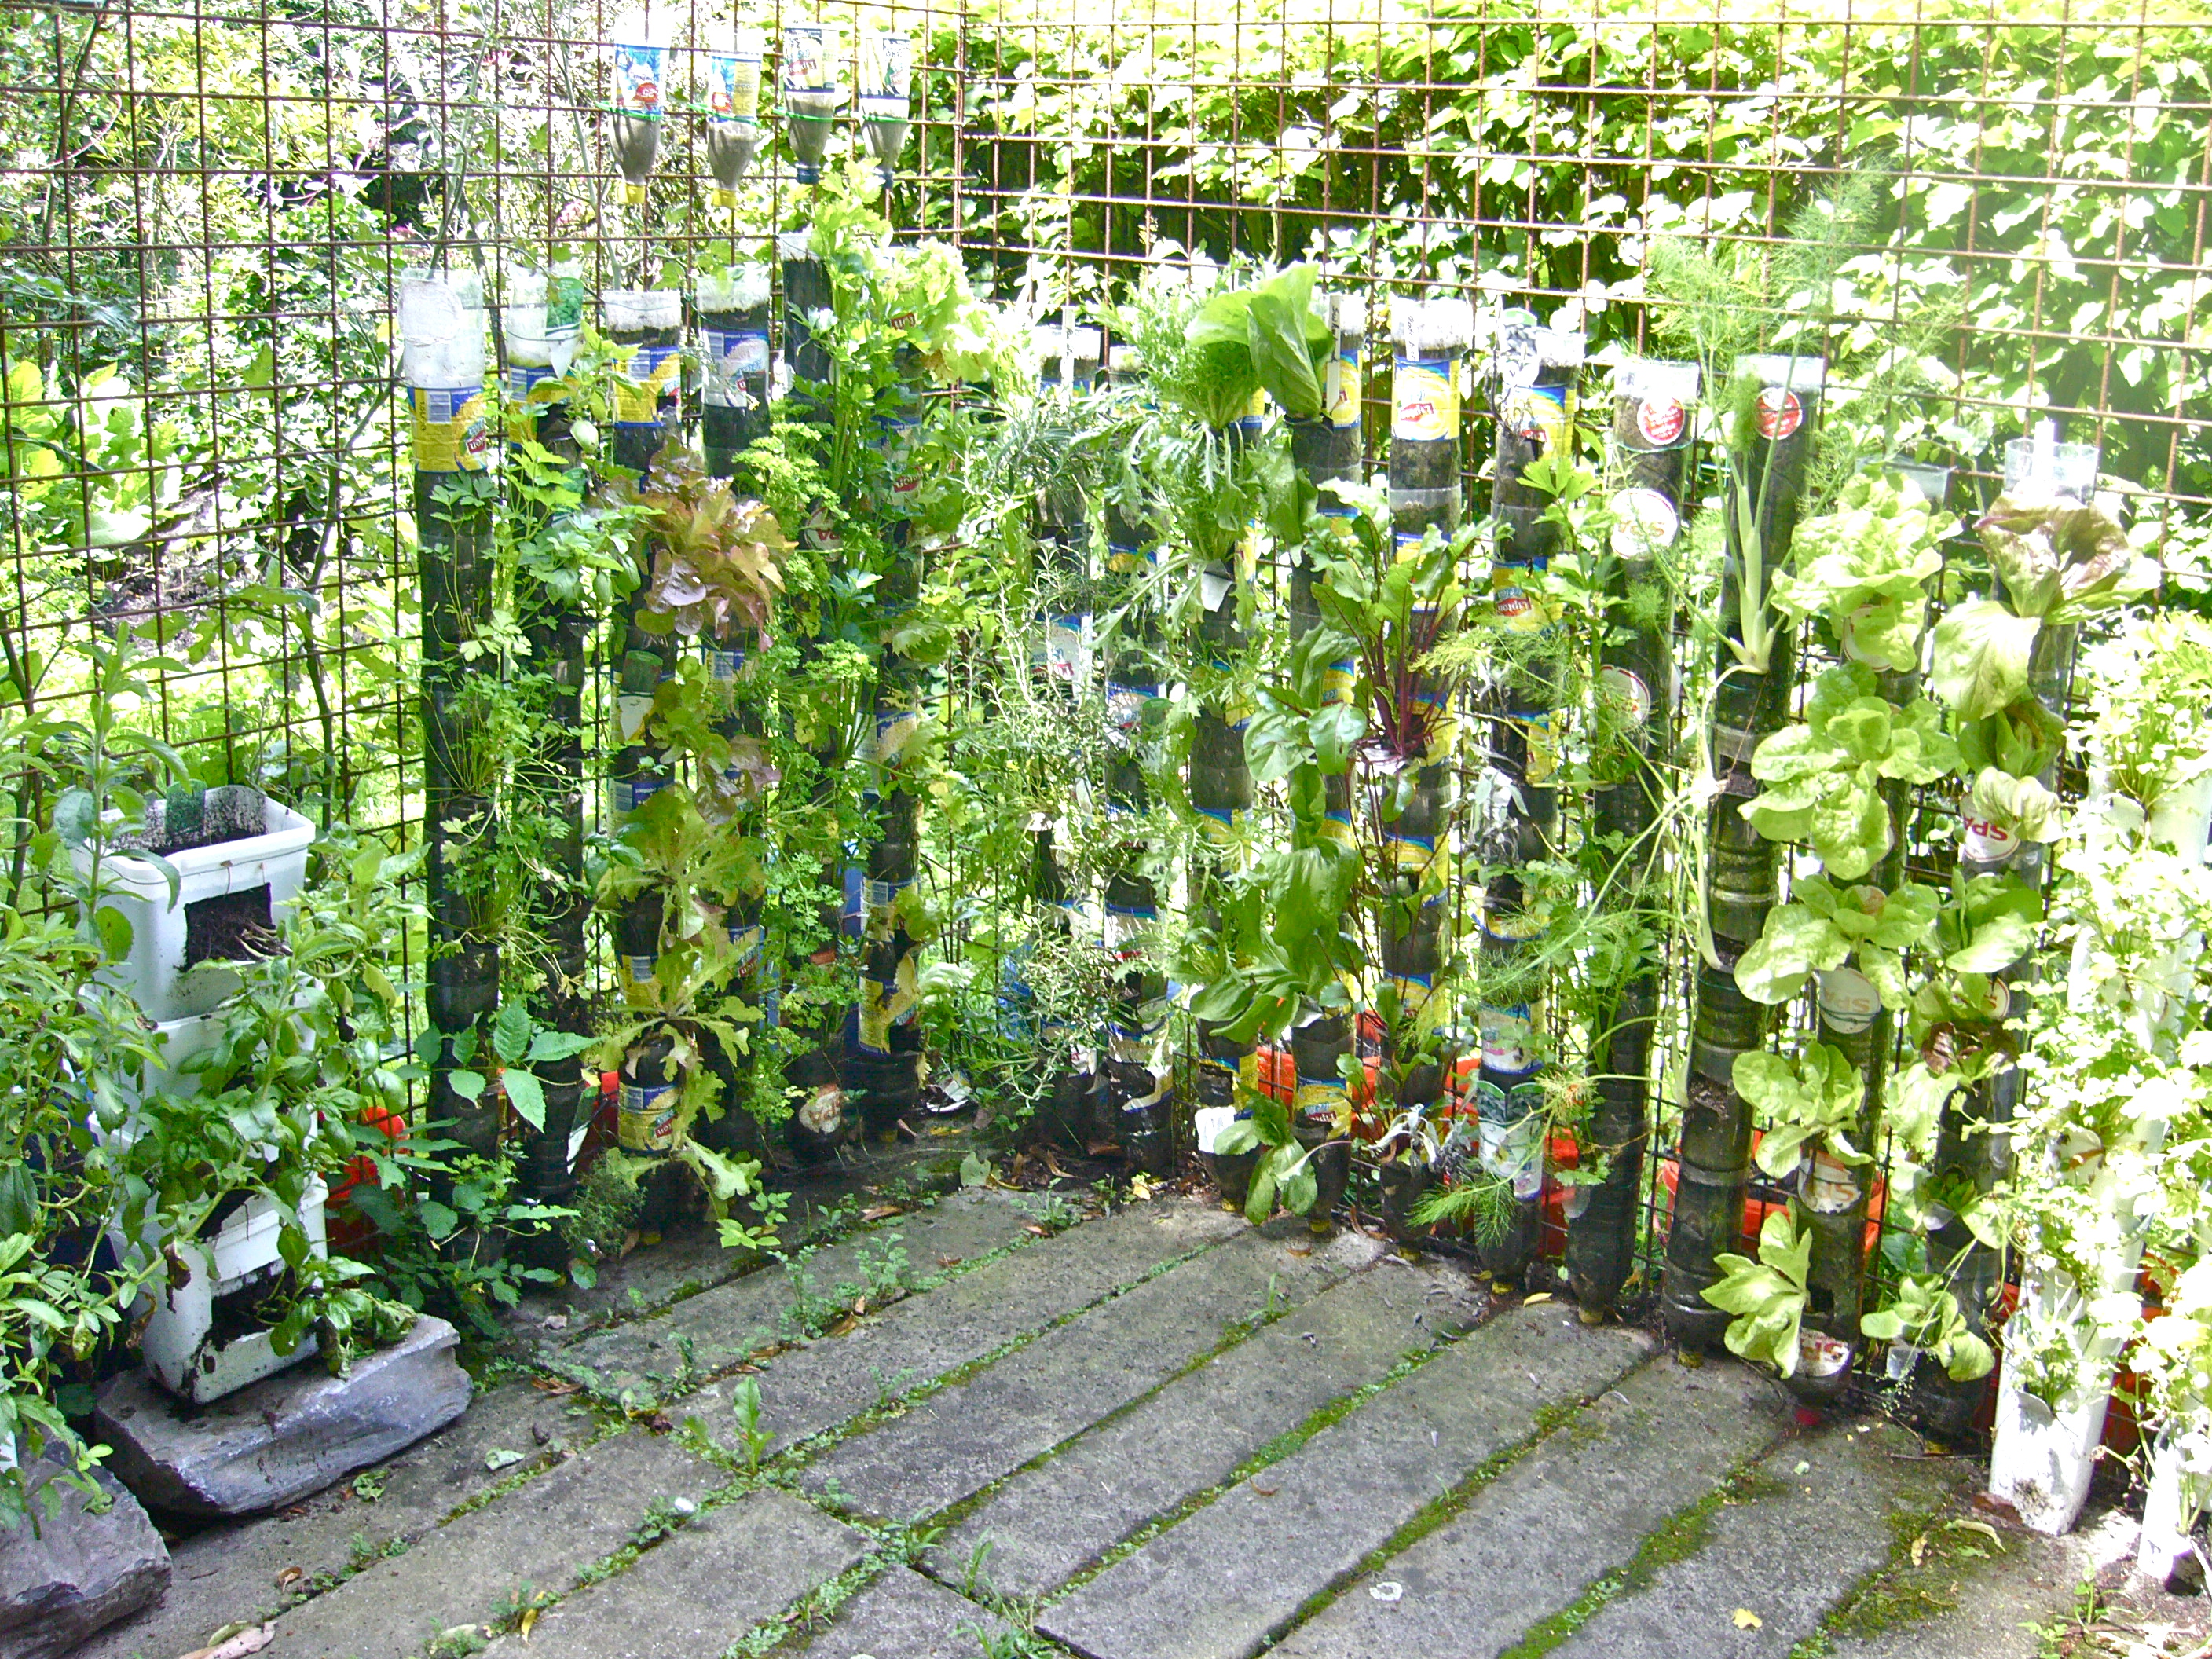
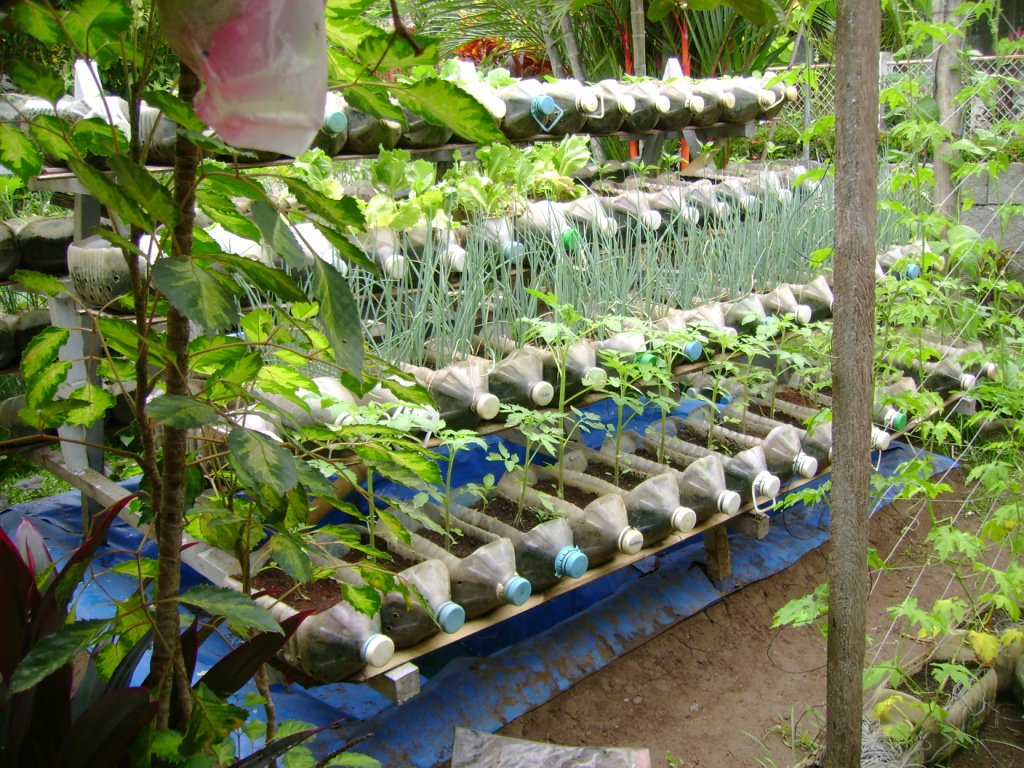
I also believe we can grow an impressive amount of food using free, re-purposed, and recycled materials, like 5-gallon buckets or Pop bottles like Mike Lieberman's garden. The Pop bottles function like a slow drip irrigation system, and a Frost protector when starting vegetables outdoors early in the year. What's also great about collecting pop bottles, is you can make some impressive greenhouses and even homes using Pop bottles, see here: Construct a greenhouse using Free Supplies.
There are many tutorials on how to construct your own Pop bottle garden, whether indoors or outdoors. You can make these systems as cheap and easy or professional. Personally, I prefer reusing plastic bottles for starting plants rather than growing plants to maturity. The soil in Containers dry out quickly, especially in smaller containers, so you may need to water plants more often. The nutrients in the soil will deplete quicker, and it will be necessary to add liquid fertilizer (i.e. compost tea) several times.
Many herbs and greens can be grown in a small container indoors, even in the snowy Winter months. Containers as small as Pop bottles can be used for starting plants indoors several weeks before the Last Frost date. After a month or so of growth, you can transplant your starters in large containers, like 5 gallon buckets or other recycled growing containers.
Mentioned earlier, I found 5-gallon buckets in the wood once, and several alongside the road, so I know you can find a collection of buckets for free or inexpensive. I have also seen some very impressive craftsmanship and creativity when growing in 5-gallon buckets.
When growing outside of the apartment or indoors, Vertical Gardens seem
to be most useful and efficient way to utilize your space. In the older post I mentioned Vertical Gardens using Wood Pallets. Wood Pallets can be collected for free at many store locations. Pallets don't have to be disassembled to reconstruct into a raised bed, but you can simply staple plastic on the back of the pallet, add dirt in between the holes, and plant. The following pictures below are good examples of using Vertical gardening space.
So far I have shown you how to grow in Containers outdoors, but I want to show you indoor methods of Gardening in Containers. Because you're growing indoors, you can control the temperature and moisture of the plants, and prevents bugs from eating the plants.
No need for rain barrels when growing indoors! Collect water from the dishes you wash, or even collect water when you're taking a shower. Even sitting out a bowl, glass, or some container outside will collect rain for you to water your plants.
The picture below is a great example of making use of Vertical Garden space Indoors.
One major downfall from growing indoors is the amount of sunlight and natural air. On sunnier/warmer days, allow your plants some time outside. When growing veggies indoors, grow near a South-facing window or a window that receives plenty of sunlight throughout the year. If adequate sunlight is an issue, installing grow lights is easy and inexpensive if growing on a small scale. If you have several lamps and light bulbs, you could even place your lamp light over or near your plants.
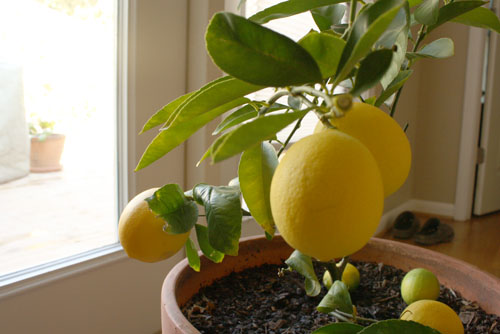
Mentioned earlier, greens, sprouts, and herbs are some of the best plants to grow in small containers, especially indoors because they have small root systems. But do not limit yourself to greens and herbs alone. With the tops of Radishes, bottoms of Onions and Celery, and eyes of the Potato, you can plant these in a pot of soil. Radishes are ready to harvest within 20-30 days. Tomatoes can be started in a container indoors throughout the Spring, and taken outside in the Summer. Some varieties of Fruit trees, like Limes, Lemons, Mandarin oranges, and Figs can be grown in large containers indoors as well.
Because growing Fruit trees is my main goal, I am intrigued by those Gardeners that have many varieties of Fruit growing in large containers. Below are some of the photos I found that demonstrates you can grow small to large Fruit trees in small to large containers. I highly recommend researching the Dwarf variety Fruit trees as these are best suited for limited spacing conditions.
Don't rush out to your nursery to purchase exotic fruit trees just yet! Locate a few large containers, and begin filling the containers with food scraps (compost) and add leaves, or other wood debris to the containers. Over a few months time the compost and mulch will decompose into nutrient-dense soil. Now that you have your containers filled with the adequate soil, it is time to transplant some Fruit trees!
All fruit trees and bushes have specific soil needs and conditions, so do some research beforehand. For example, Apples, Pears, Blueberry bushes prefer a soil pH between 6.0 and 6.5 (acidic soil), while Apricots and Oranges prefer a soil pH above 7 (alkaline soil). Fortunately many Tropical fruit trees tolerate acidic clay soil. Of course it's not just the specific pH of the soil. Fruit varieties have specific watering and sunlight needs.
Seeing these Tropical fruits growing in Containers gets me excited to do
the same. I could buy (or find) a 20 gallon pot, fill the pot with
compost, leaves, and other mulch materials, then cut the top off of a
Pineapple and plant it in the pot of soil. After a couple of years, the
Pineapple fruit will look similar to the one in the picture above.
Container gardening does not have to be limiting. Although you may feel limited in the amount of space you have outside or inside your apartment; and although you may not be able to have a permanent garden, gardening in containers creates endless possibilities. Take your freedom back, and plant a garden anywhere! Expand your gardening skills outside of your apartment or Rental home by Starting a community garden, or Ask your Parks and Recreation department if you can plant fruit trees within the Park. This will encourage others to donate fruit trees, and possibly provide homeless peoples with free food.