Showing posts with label gardening tips. Show all posts

Friday, August 14, 2020

Flowers and hopeful garden prospects


In the picture above, I have containers and pots of tomato plants, basil, peppers and seedlings. Additionally, I sowed cauliflower and cabbage in seed cells at the apartment. Some broccoli germinated and are seedlings from the last attempt at sowing fall crops. I have been fertilizing them,  the pepper plants and the tomaotes with coffee grounds from Ashley's many pots of coffee. 

Not much is growing in the gardens, besides flowers. There's been attempts to grow fall crops but I have failed all of those attempts thus far. Last week, I sowed turnip, radish, and carrot seed in the garden beds. I sowed the seed in between the Coxcomb flowers. I put up fencing to keep my cats out. And, this will be my last attempt at growing fall crops. 

Below are the hibiscus and coombs growing in my garden. 


Here are some cucumbers I harvested. The summer garden harvests have been lacking but I'm hopeful for a turnaround in all the tomaot plants I have planted. At least I may be able to can them for sauces or soups. 


In between the Coxcomb plants, I have sowed carrot seed. In the garden bed beside this, I sowed radish seed. The radish has germinated and are growing just fine! We shall see if I will have an abundance of radish like I did in the spring. Across from these two Garden beds, I also sowed turnip seed. I didn't try to sow them oh-so-perfect because they were old seeds, but I hope they grow and produce! 


I think a lot of my garden issues this year have been attributed to planting old seed. Seeds are really only viable within 1 to 2 years. But I have a bad habit of accumulating lots of seed overtime because I buy in bulk or people gift me lots of seeds. Another big issue has been birds or other critters eating the seeds. Even after nearly a decade of growing food, I am still learning the garden techniques and mistakes to never make again! 

Thursday, July 9, 2020

Growing a vertical garden & container gardening in early July

Everyday, I smile at this whimsical little flower garden. I planted these back in the spring but I couldn't tell you what the varieties are except identifying some sunflowers.


Other flowers growing at my garden are hostas with their dainty purple goblets. Mimosa trees are blooming hair-like, heavenly fragrant flowers. The daylilys died out and now the tiger lilies are blooming in their place.

Mimosa 

Hostas


tiger lilly

At my grandparent's, I planted these gladiolus and they are absolute royalty!


There's so many beautiful flowers at my grandparent's garden. I admire each individual flower every time I visit which you can see in the previous post.

Phlox and gooseneck

This hot weather has turned dry. It has been nearly 100 degrees everyday for a week here in North Eastern Kentucky.

There hasn't been rain in over a week. So I have been watering my container garden for the last 3 days. The containers dry faster so I focus on their needs first.

As well as watering the veggies in the containers, I have been using my own compost too as fertilize for the veggies. I have tomatoes, peppers, squash and cantaloupe in the container pots. They respond really well to the compost and grow quick!


Desperately, I need to water my grapes, berries and fig trees as they are fruiting now. I have been harvesting blackberries for over a week. It is early July, and that's the exact time to start picking berries and foraging chanterelle mushrooms here.


At least these plants are growing food. I was disappointed that the cherries, plums, peaches, nectarines and peaches were affected by the late frost. This should give you a tip if you're first starting a food forest: focus on late blooming fruits if you live in a cold climate. Of course, there's advantages and disadvantages to every garden endeavor.

At my apartment, I have many tomatoes and some pepper plants in pots as well.

Used my own compost to make the
plants grow big,  fast!

Jalapeno pepper plants

These were tiny tomatoes weeks ago before I mulched them with compost 

Basil plant too!

Also, I have cleaned up two garden beds, slowly trying to clear out all of the old radish, lettuce, spinach, cilantro plants. I harvested cilantro and arugula seed and cut it out yesterday.
Today, I spread soil overtop of the garden bed and transplanted Coxcomb flowers in the bed. These are plants that my grandma had growing extra from her flower garden, so I took some to add a little pizazz to the garden as the Phlox and Hibsicus and other whimsical flowers bloom.

Coxcombs planted

In the garden bed next to this, I cleaned it up last week and spread soil overtop then sowed zucchini and pea seed. Some zucchini and peas have come up, but I have struggled this year from pests eating seeds

Slowly I am cleaning up the garden, I'm hoping to get them cleaned up and ready for sowing cauliflower, cabbage, broccoli and brussels sprouts seed.

In my garden over the mountain, I tilled and hoed my tomatoes today.


I also hoed around the rows of corn. I strung up twine around posts as support for the corn.


Then, I put up more fencing for the cucumbers that are intertwining with the corn and cushaw. I wanted to keep all of the vining plants separated so there are barriers for them to grow up and not entangle to strangle any corn.

Cushaw growing on fencing

Cushaw, corn and cucumbers 

Now in this garden, there are big cushaw plants in 4 small rows, corn growing in 4 small grows, cucumbers in 3 small rows, and tomatoes in 4 small rows, and 3 rows of potatoes. I have beans planted but the seed was old, so I may plant lettuce and radish seed here now because this garden is cooler and shady.

Because it's early July, I don't have much time to plant any more beans, corn or any summer crop. But, any further planting will be for fall crops. And in this stage of planting fall crops, you have to be more diligent in composting and watering to ensure healthy, sustainable growth even in the cold nights that will soon come in October.

Saturday, May 5, 2018

Three Sisters gardening: corn, beans, & squash

Hello my garden people. It is May 4th, and the Iris flowers have bloomed today so beautifully. I didn't notice them even trying to form heads at all, so they made a speedy bloom.


Today was supposed to rain but I waited to realize that it wasn't going to rain until later in the night. So this afternoon I tilled two spots in the second garden and planted in three sections.

Here was already tilled, so I quickly hoed 7 rows of different varieties of greens next to the potato patch. There's Tatsoi, a Chinese mustard green; Georgia collards, Bibb lettuce, Black seeded simpson, Red Cinnamron, dwarf curly kale, and Swiss Chard in the back next to the woods.

Mounds of potatoes merging into rows of greens


In the pic below are the two spots I tilled today. On the end, I hoed and planted in Cushaw in the front row, then two rows of Sweet Dumpling squash, two rows of Delicata squash, then in the back I planted two rows of Hickory King corn. Next to this section I planted in Half runner beans which I will trellis. Fortunately I did all this before it rained.

Sowed squash, corn, and beans


I think it's going to rain tomorrow as well, so I'm going to wait for the next dry days to till this section and plant more varieties of beans and corn to create the Three Sisters gardening method.

Need to till and plant more corn and beans here


The method is noted as being beneficial because the beans supply nitrogen, the corn supplies a post for beans to grow on, and the squash suppresses weeds.

This method has been passed down from Native American tradition and is used widely among many gardeners. Corn, beans, and squash are of course southern American traditional foods as are potatoes and fried greens, so naturally these are the veggies I'm growing because I was raised on these foods. Try this method in your garden as well.

Wednesday, October 28, 2015

Lowes mini Greenhouse product review (VIDEO)

Here is another product review I have finally made. This is the mini greenhouse that is sold at Lowes, so I share with you my experience with this product for the (almost) year I have been using it in the video below.


Tuesday, October 21, 2014

Fall 2014 Gardening Projects

Much of the expansion work that goes into my garden begins in the Fall season. During the Spring and Summer I am not focused on expanding the garden because I am growing food at that time. In the Fall and Winter I am usually growing a small lettuce or kale garden but I can still work around it.

For now I am expanding the garden by including new Fruit trees; mulching all the Fruit trees; cleaning up ivy around the property line; making raised beds with logs; and constructing Hugelkultur beds.

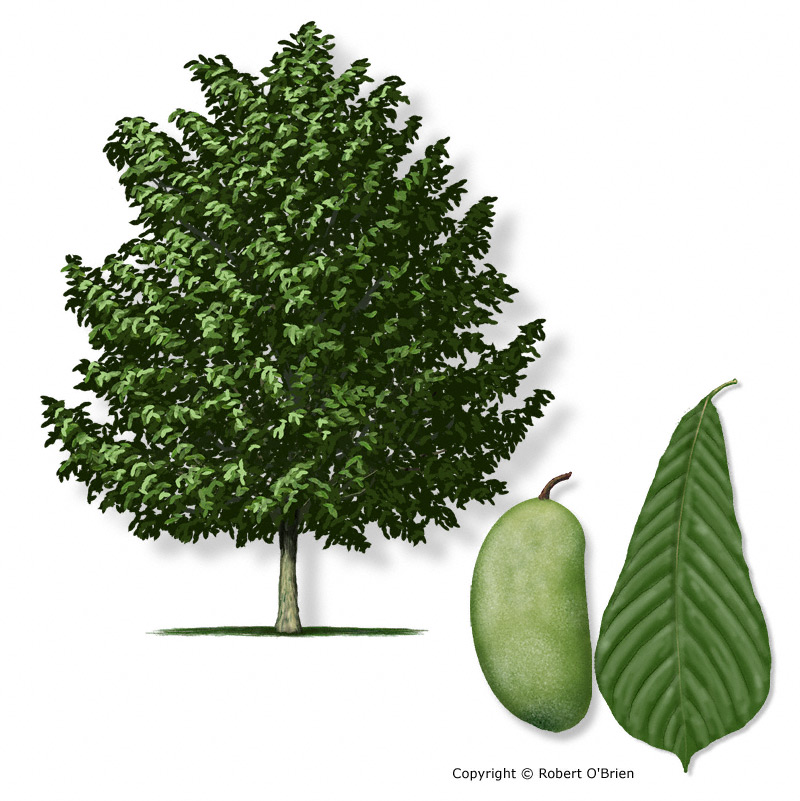
I'll begin by talking about the Fruit trees I am transplanting.  A native fruit to Kentucky, the Paw paw, can be found growing in damp, shady locations of wooded areas. My grandparent's have a small grove of Paw paws (over 100) in their woods. The trees have not started to fruit, either because they need a pollinator of a different variety of Paw paw, or they are still too young. Luckily, I (think) I have found a Paw paw grove in the woods behind my house. So I have transplanted five (young) Paw paw trees on my property, and soon I will transplant several Paw paws from my grandparent's woods. Paw paws are generally self-incompatible, so you need two trees for cross-pollination. Plant at least two different cultivars or seedlings. Two grafted trees of the same cultivar will not cross-pollinate. Hopefully because I transplanted young trees and because I will be planting two different varieties, the trees will grow quickly in the Full sun and produce fruit within the next couple of years.
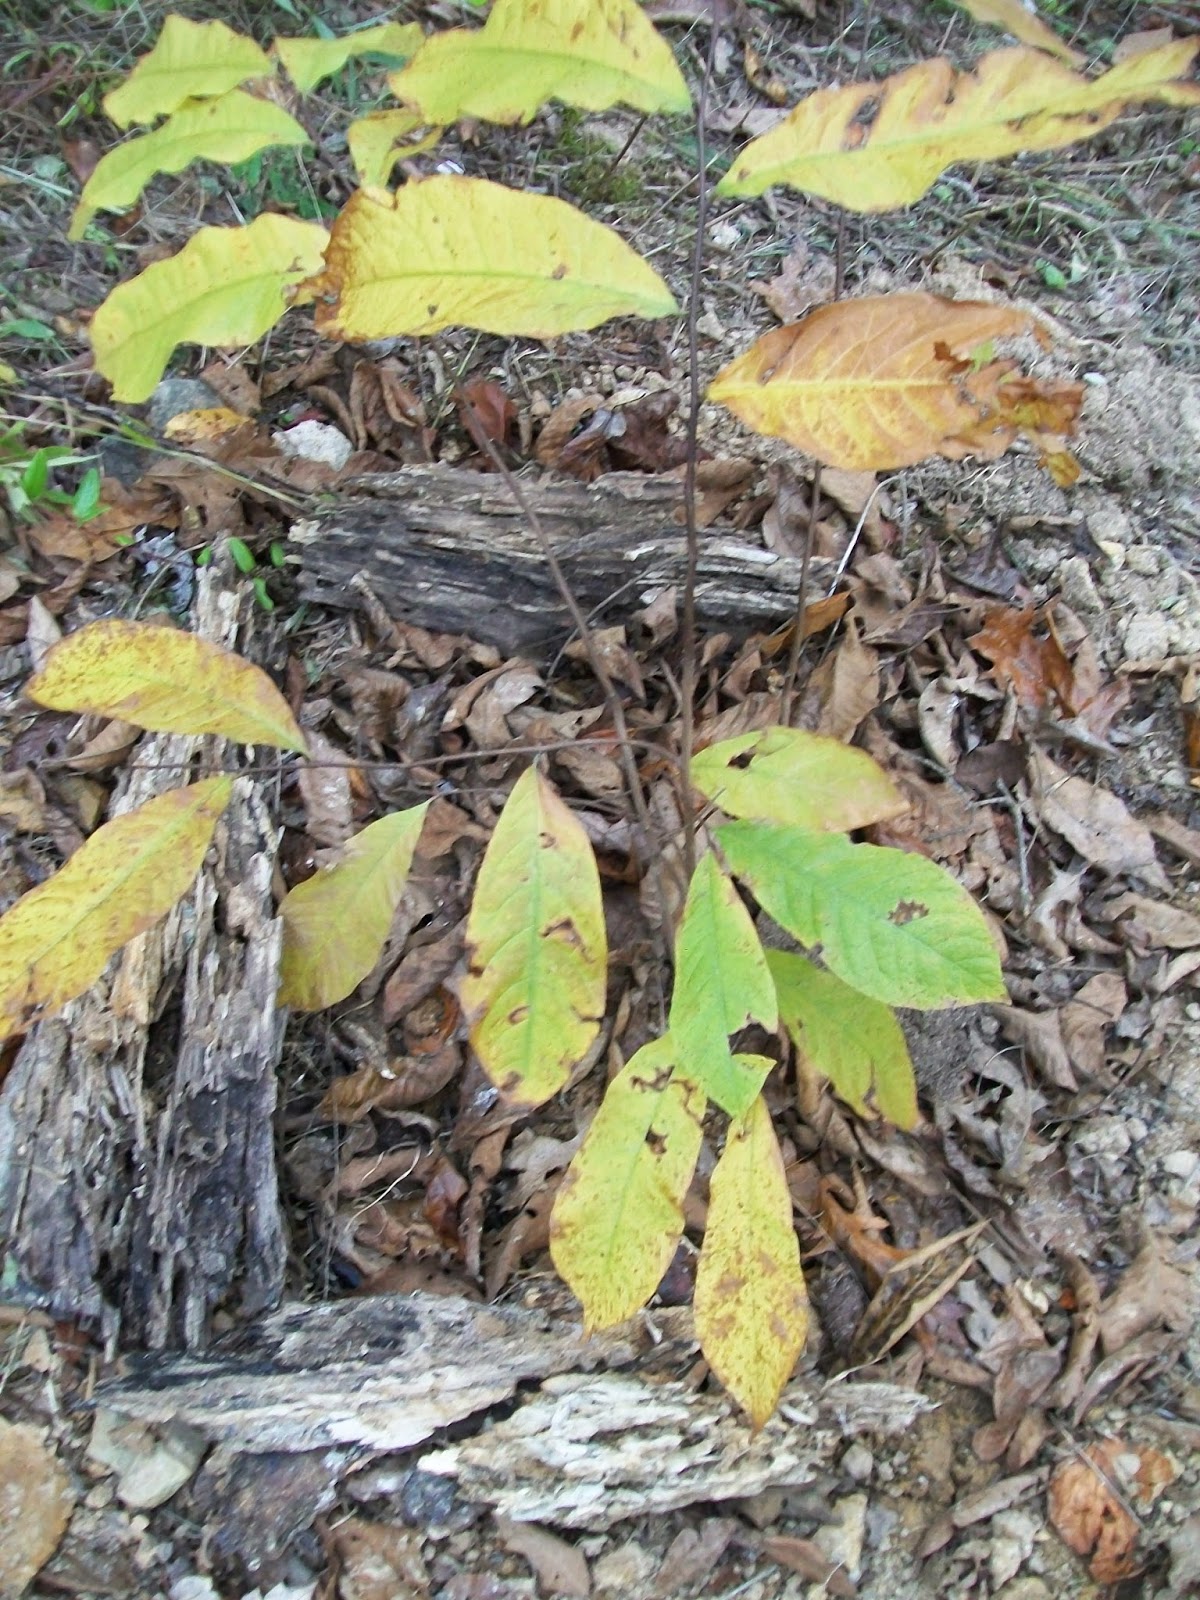
Paw paw transplant

This may be the only tree to survive transplant


As stated I have already begun to clean up the bank for transplanting Paw Paw trees. I intend to transplant additional Nut and Fruit trees along the edge of the property line.
Because we have woods connected to our yard, along the edge becomes a wily mess of entanglement. I want to clean up the 3/4 of an acre, add mulch, cardboard and rock to "structure" the area, then dedicate every inch of the property to Fruit trees, vining Fruits, nut trees, Flowers, garden, a pond, Cob home, and solar panels.
The cleaning process is a lot of work because I am sourcing logs, sticks, leaves, soil, and native plants from the woods. I am able to create my projects for Free, but this takes much more manual labor. I am not buying soil or mulch from a big-box-store, I am collecting materials by hand, and carrying buckets (or barrels) of soil, leaves, rocks, and plants from the woods to my home. And I am carrying 80 lb logs from the woods to my home.
So you can see where these projects are a slow process, but beautiful and fulfilling nonetheless.

Secondly, I am practicing Hugelkultur methods within my first garden; and also making Hugelkultur raised beds in other locations of the yard. Hugelkultur, German word meaning mound culture or hill culture, where decaying wood debris and other compostable biomass plant materials are added to composting raised beds. For an explanation and example of Hugelkultur, watch this video by Paul Wheaton, here.
I'll continue to update you on the progress of the Hugel beds. As you can see in the photos below, the beds of logs, sticks, and leaves are the first phases. Eventually, additional compost, leaves, and other mulching material will be added to make nutrient-dense soil for planting.

I'll continue to update you on the progress of the Hugel beds. As you can see in the photos below, the beds of logs, sticks, and leaves are the first phases. Eventually, additional compost, leaves, and other mulching material will be added to make nutrient-dense soil for planting.

Phase 1 of Hugel bed 1
Phase 1 of Hugel bed 2

Phase 2 of Hugel bed 2
I am also using the Hugelkultur methods within the garden. See below in the photos how in between rows, I have layered the bottom with large logs then small sticks and leaves at the top. Eventually these beds will have compost and additional leaves/mulching material which will break down over winter.


From the Pine trees (you see of the background in the photo below) I have collected Pine needles to use as mulch, which I have used on the 7 blueberry bushes you see in the photo.


Pine needles as mulch around blueberry bush
I have also been mulching my Fruit trees with pine needles as well, including the Pears, Peach, Plum, Strawberry beds, Cheery trees, Fig trees, and Grape vines.

Kieffer Pear

Kieffer Pear

Damson Plum
 
Chicago Hardy Fig

Chicago Hardy Fig
Concord  Grape
Concord Grape
3 Strawberry beds mulched with pine needles

Golden Jubilee Peach
 Additionally, I have been hauling pieces of logs from the woods to create raised beds. Below you can see I have completed two beds framed with dead logs. I have already started on a third raised bed. It took me several days to scope out pieces of logs in the woods, compile them, then haul them down the hill to my house. In the photo below are the two completed raised beds, and in the upper right corner, you can see the four of the five Paw Paw trees transplanted.


As the Fall season progresses into Winter, I will continually add Pine needles to mulch the Fruit trees, fruit bushes, especially the newly transplanted Paw Paw trees. Once all the leaves have fallen off the trees, I will use them to mulch my garden.
Perhaps I will have to resort to collecting leaves from the woods if I run out of leaves to rake around my yard! I'll also still collect logs and branches from the woods to use in the Hugelkultur mounds.

Although I do not count this as a gardening project or task, I am spreading the seeds of fruit, including pears, apples, and persimmons around my yard. All Summer I threw out Tomatoes and other rotting fruits around the yard rather than the compost to see if Volunteer plants come up. Hopefully I will see fruit trees spreading across the yard.

Of course other gardening tasks will keep me busy, such as cleaning up the property line of brush, ivy, over grown weeds. This will be a process over Winter which will include laying out plastic or cardboard along the property line, then adding rocks and mulching to create a presentable-look. Then I will plan to begin transplanting Nut and Fruit trees within these areas. 

As if all these projects were enough to keep a woman busy for months, I have also started on digging the Trench for our Cob home, which you can see in this video: Digging outline for Cob home trench.

I highly encourage everyone to see the freedom and pride of growing food. Food is the number one necessity, and can even be linked to all the worlds problems. Eating the food with which you grew, and expanding this ideal to every household and every being could create a self-healing community.
Gardening can be a full-time job once you realize the potential of the land around you; and how much space you can utilize. Even 3/4 of an acre has the potential of feeding at least two people all year round. And because gardening can be absolutely as Free and primitive or expensive and technological as you desire, you can create a self-sustainable system which withdraws you from the greedy scheme of the 1 percent, lobbyists, government, and media.