Saturday, October 31, 2015

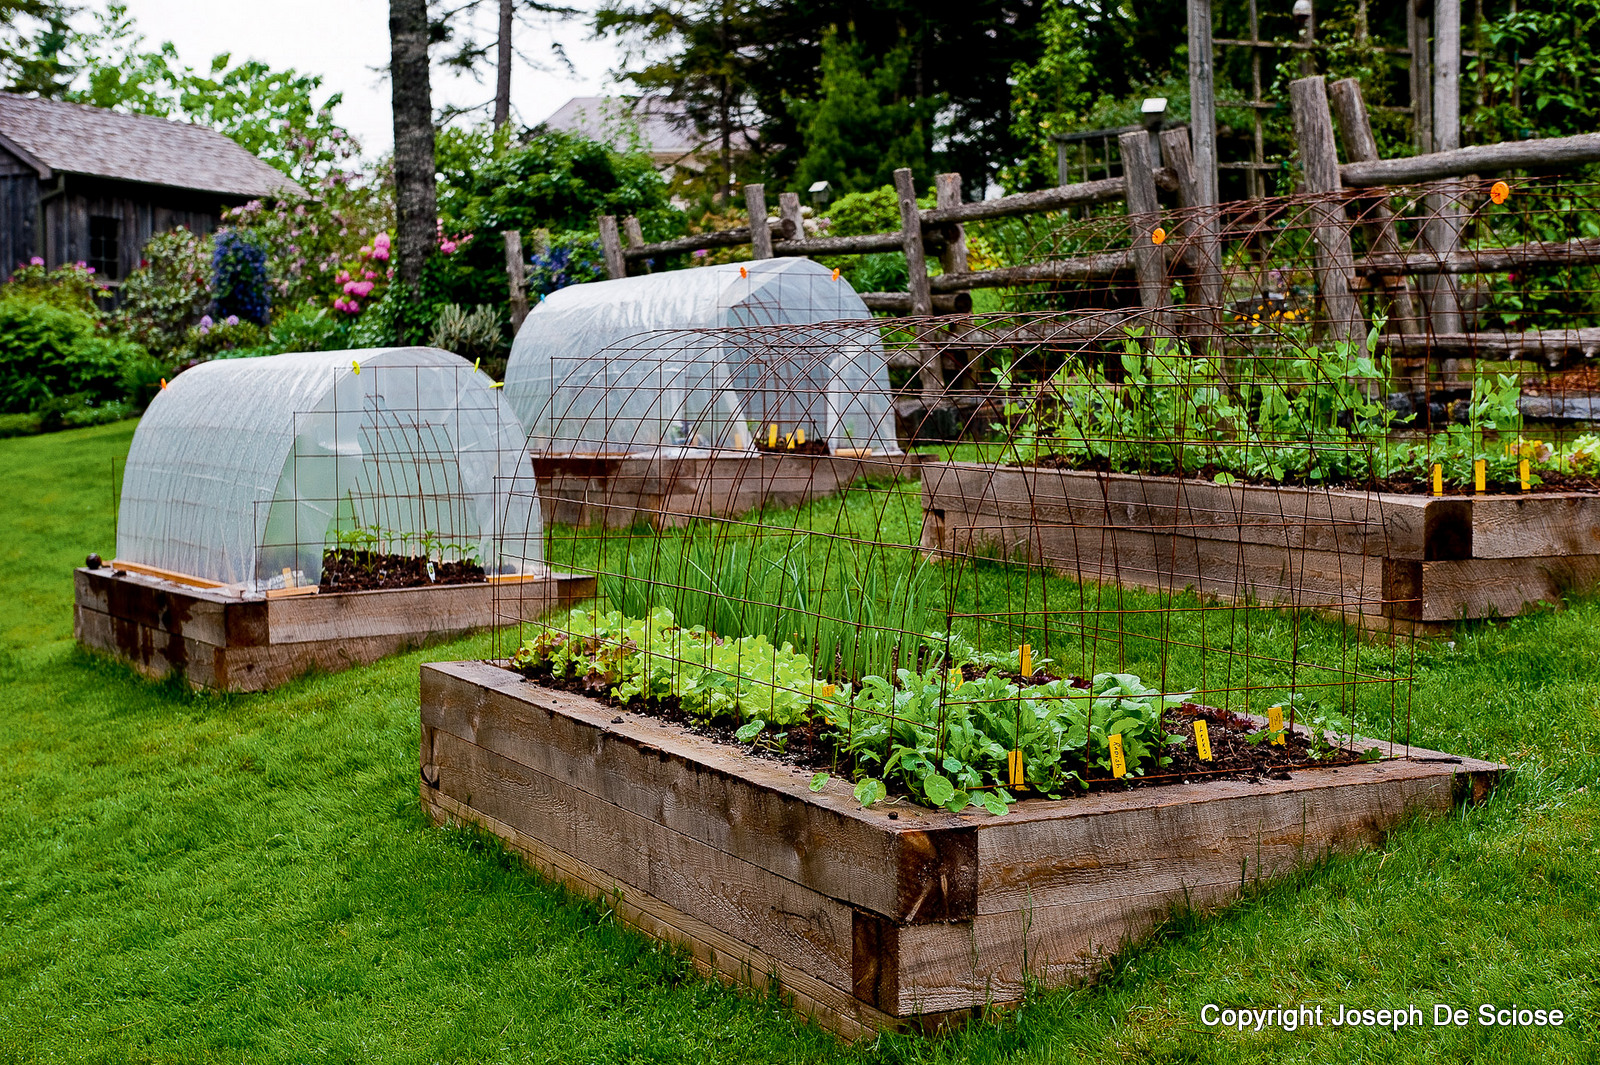
Cold frames made out of recycled materials

Cold frames function like a mini greenhouse because they are small enclosures, usually low to the ground, and protects plants from the cold. Cold frames have a transparent (plastic or glass) top, allowing sunlight to enter and trap inside. This prevents heat from escaping, which creates a micro-climate providing "several degrees of air and soil temperature insulation, and shelter from wind. In cold-winter regions, these characteristics allow plants to be started earlier in the spring, and to survive longer into the fall and winter. They are most often used for growing seedlings that are later transplanted into open ground, and can also be a permanent home to cold-hardy vegetables grown for autumn and winter harvest" ("cold frame", wikipedia).

The best cold frames I have seen were made out of recycled materials, found around the yard/house or in the woods. And usually when making cold frames out of recycled materials, this requires minimal materials, less work, and usually no power tools.
Most often I see the top of the cold frame made out of recycled windows or doors. Actually I use recycled glass shelves from an old refrigerator to protect the greens growing in buckets (here). The frame can be made out of recycled pallets/pre-cut wood, sticks/branches/logs, bricks, stones, cinder blocks, straw bale, and much more.
Here I show you the cold frame ideas made out of recycled materials, or minimal materials.

pinterest
pinterest
pinterest


Landshare

High mowing seeds
SHTF prepper
photo source

Bepa's garden
Cold frames can be as rustic or professional as you can manage. The mindset is to make it happen, rather than set yourself up for limitations.

Spotts Garden Service
When starting a fall or winter garden, do not think so large scale, because you may not be able to cover and protect all your plants. Usually I grow a small patch of greens throughout the fall and winter, and that is just enough to for a salad everyday. This year I wasn't as successful because of other challenges (squirrels and other animals digging up my seeds and eating the plants). 

photo source
seasonal wisdom

photo source

Lastly, an important tip in making the cold frames: angle the cold frame so that it faces south, and the glass is 39 degrees from the back wall (which should be taller than than parallel wall.

Thursday, October 29, 2015

How much water for garden vegetables (VIDEO)

In this video I show you the progress on the garden of greens as well as how much water to give certain garden vegetables. 


Wednesday, October 28, 2015

Lowes mini Greenhouse product review (VIDEO)

Here is another product review I have finally made. This is the mini greenhouse that is sold at Lowes, so I share with you my experience with this product for the (almost) year I have been using it in the video below.


Tuesday, October 27, 2015

Diva Cup product review after 7 years of use (VIDEO)

I finally made a product review of the diva cup. I wanted to share some information and tips for those that are interested in switching from tampons/pads to a healthier, environmentally conscience alternative.

Something very important I did not mention in the video is that, Diva cups as well as other menstrual cups will last up to 10 years as long as you sterilize, use, and store the diva cup properly. You'll need to sterilize your diva cup each month before use. To do this, boil your Diva cup in a saucepan of water for 5 minutes or so. Turn the diva cup as it boils so not to burn or scorch it. Afterwards, clean with the Diva wash. Wash clean the cloth pouch that holds the diva cup as well. Clean your diva cup with water before you insert it (every time); and clean with the Diva Cup wash 1-2 times a day as needed.

Watch the video below for additional information.


Monday, October 26, 2015

Apple, Persimmon, & Nut Foraging in Fall months

When you think of foraging in the woods, you usually think of collecting mushrooms and wild greens, but you can forage for fruit and nuts this time of year as well. These wild edibles are much easier to identify and container more calories and nutrients. I have written a post before detailing the common wild edibles to forage during the Fall months, such as chickweed and green onions (which you can read here).
I have many hickory trees dropping their nuts between September and into November around the yard, so I can pick hickory nuts to eat, but since I am competing with the squirrels, I do not bother picking them. Other nuts I forage during this time of year are Walnuts and Pecans. I find that Walnut trees have become prevalent on the sides of roads in Kentucky, so you'll most likely be able to harvest a bucket full of walnuts when walking along roadsides. Every year, James and I pick walnuts and pecans.
Fruits to forage this time of year are Pears, apples, and persimmons. These fruit trees may not be growing in the woods, but they may be growing in an abandoned lot or alongside the road; but there is no need to forage these fruits when your neighbors have them growing in their yard. I have actually picked some apples and persimmons from neighbors' trees because they did not want them.

My struggle with picking persimmons is that I have to wait till they drop to ensure they are ripe. I recommend freezing persimmons overnight to take out the astringent properties. Here are the photos I took of our Apple and persimmon forage. I did not pick many persimmons because there were not many on the ground. It seems that the squirrels and other critters are getting to them quicker than I.


Sunday, October 25, 2015

Greens & Herb harvest + Unique way to use Herbs from the garden

Water greens a couple times a week as this will promote leaf growth. With a natural fertilizer such as compost tea or diluted urine, fertilize your garden greens once a week or every other week. This is especially necessary for those vegetables and greens growing in containers.


radish patch


I harvested some greens from the container garden which I intended to prepare for James' mother. I hoped to make her a big salad with her lettuces, arugula, green peppers, and tomatoes from the garden. 


I also harvested herbs yesterday, which I chopped and then froze in olive oil to use for future meals. To do this, chop each herb finely and add to individual cubes, and then pour olive oil into each of these cubes with the herbs. They will freeze into the shape of the ice tray, and will keep for as long as you store them in the freezer. This will keep them fresh until you decide to use them in stir-fry, spaghetti, etc. 

Below, shows you the herbs I have frozen in olive oil, such as Sage, Parsley, and Rosemary. I had harvested much more rosemary, but I dried the rest in a food dehydrator, and stored in a glass jar.


Tuesday, October 20, 2015

Harvesting Luffa (loofah) gourds to make into bath sponges + Pumpkin decor & carving

"After the frost killed the plant, I harvested the four luffas from the vines. I grew the Luffa plant in two large garden pots, and used a recycled drums for the vines to crawl on. Luffa gourds should be grown on a strong fence or trellis. They need a long growing season of 150 to 200 warm, frost free days" (gardensnet).

As you can see in the first picture, the luffa plants were part of the fall setting. There was a tiny gourd among two medium-sized gourds and one extra large luffa. You may have seen pictures of them in previous posts, but here are some photos of the luffa harvest.


You can eat this gourd when it is smaller, but I specifically grew the gourd to make into a bath sponge. Once the luffas stop growing, and after the first fall frost, harvest the luffas. At this point, let the gourd dry indoors for a couple of weeks, or until the outer skin becomes brown and brittle. 
Shake loose the seeds from the gourd and store them in a cool dry place. To clean the gourd and prepare for using as a sponge, most people recommend soaking the gourds in a solution of water and 10% bleach. Do not soak them for too long because the bleach will break down the fibers. Instead of bleach, you could soak them in lemon water with hydrogen peroxide; OR lay them out in the sun, which will naturally clean them. Dry them in the sun for 2-3 week before using. 


Using the pumpkins you see in the first photo (from the fall scene), James and I carved pumpkins last weekend. With the small pumpkin, I carved the letters "HP" to resemble the Harry Potter font. I wanted to continue with that theme since I had painted a sign "9 3/4". I also painted a Halloween/witchy/spooky scene on one of the large pumpkins.


Of course I saved the pumpkin seeds to grow next year, along with cushaw seeds. 

drying pumpkin & cushaw seeds

Monday, October 19, 2015

List of Frost loving vegetables to grow (& extending the garden season VIDEO)

persimmons picked in late October 2014
Although it may be too late to grow these vegetables outdoors, you can always grow them in containers and take them indoors at night. And although you may not be able to sow these seeds now, this list is a reminder of those cold weather vegetables that you can grow throughout the cold Spring months, and what to plant before Fall of next year. This list of vegetables will prepare you for next year, so that you can grow where you are, and grow year round.

Regardless of where you live, there's a few crops that withstand cooler temps, frost, and even sometimes snow. You may have heard before, persimmons are best picked to eat after a frost, and  likewise, some of these vegetables listed will become sweeter if they grow through a frost too. Below I have listed the root and leafy vegetables that grow during the cooler months in February, March, and April, and October through November. In the pictures below, are the root vegetables and leafy greens I harvested in these colder months.

Most of these vegetables listed can withstand temperatures as low as 15 degrees Fahrenheit. The most common crops which you can grow through the cool winter months are root vegetables including,

Turnips


Turnip harvested in late October 2014
Radishes
Radish harvested in early October 2015
Parsnips
Beets
Green onions
Rutabaga
Carrots


Carrots harvested from garden in late October 2015


The most common green leafy vegetables you can grow throughout the winter months are,
Brussels sprouts
Cabbage
Collards
Mustard greens
Broccoli
Leafy vegetable growing in early March


Leafy vegetable growing in early March


Cauliflower
Celery
Kale
Leeks
Spinach
Swiss Chard
Lettuces
Late Fall and Early winter lettuce garden 2013


Remember when growing through these colder months, to use garden cloths, transparent plastic sheeting, and garden cloches. Polytunnels are elongated plastic coverings that are good for covering long rows of plants. Cloches are any type of covering that protects plants from snow, cold temperatures, and "pests". Cloches can be made with any recycled plastics, glass, and other materials. This method ensures plant protection in  early Spring months, or when extending the growing season into Fall and Winter. Cloches that are bell or tent shaped allow room for individual plants.
View my post  in the link for more ideas at Cloches plant protection (early planting & extend growing season).
A couple weeks ago I showed you how I was protecting my greens and root crops in this post: Keeping greens warm at night & protected from rabbits. And below I show you in the video how I am protecting my pepper plants from the frost:


Thursday, October 15, 2015

Carrot, pepper, bean harvest

Yesterday, we harvested carrots, peppers, beans, and some tomatoes. These vegetables may be the last to harvest this year, as it is going to frost tomorrow. But I have taken some precautions in saving the pepper plants, fig trees, and the greens. In a previous post, I showed you how I am protecting the potted greens with glass panes: Keeping greens warm at night & protected from rabbits.
.
I am using a garden cloth to cover the fig trees and also the lettuce garden; and I am using a transparent plastic sheet to cover the entire row of peppers, which you can see in the video here: How to protect pepper plants from frost or cold nights. I really want to save these plants for another week or two at least.

The avocados growing around the yard and also the eggplants were transplanted into a pot. I have the avocado plants inside the house, and the other tropical plants are inside or in the greenhouse. I covered the potted eggplants with a plastic cone. The cone was actually my dog's cone that she had to use after her surgery, so I figured I would re-purpose it. 

The pictures below are what we harvested yesterday.


Tuesday, October 13, 2015

A 16 year old photo that foreshadowed my future

Who knew that I would still be here in 16 years-- still admiring fruit trees on the same property. It's almost as if this 16 year old photo foreshadowed my future.
If I recall correctly, this is a picture of me at the age of nine. I am standing beside a white blossoming Plum tree. It must have been a warm spring day. Here I am enjoying the scent of the plum blossoms, and admiring all the blooming fruit trees in our yard.
At one point, my family had several plum trees, pears, cherry trees, peaches, grape vines, and maybe other fruiting plants growing in the yard. These old fruit trees are gone now because my family cut them all down (several years after this photo was taken), in an effort to level the ground and put a house in the backyard. This never happened, and instead all of the fruit trees were cut down in vain. The ones that remain are a Peach tree and an Apple tree that are probably 30+ years old. They still fruit, of course, but I am not sure they have much life left.


And looking forward into the future, 16 years later, I am growing fruit trees on the same property. Where the ground was leveled and intended for a house, I am growing a big garden. On the property, I have 2 plums, 2 pears, 3 figs, 2 peaches, 2 nectarines, 1 cherry, and 20 pawpaw trees with additional berry bushes, grape vines, walnuts, and a hundred hickory trees. I continue to add fruit trees and fruiting bushes every spring and summer. My intention is to grow a beautiful food forest that feeds me, my family, friends, the animals, and others in need.

Today's Fig harvest

The fig trees know a frost is upon us, and the ones that are left have started to ripen quickly.
Here is a picture of today's fig harvest.


October 13th 2015 fig harvest

Saturday, October 10, 2015

Harvesting Figs in October (Zone 6)

If you have been keeping up with my posts, you have seen the many figs I have been harvesting from the trees. For the last month I have been picking a couple of figs per week. It wasn't until July and August that the figs started to form on the trees. But I noticed that the figs would be little greens nubs one day, and then they would be big, plump, luscious purple fruits the next day! Of course the Figs taste excellent, what I would describe as a mix between Peaches, Plums, and Apricot jam.
If I recall correctly, it was near November when caged, mulched, and covered the fig trees. Now that we are approaching mid-October, and the nights are getting down in the 40s, I am sure the figs will stop producing and ripening at all. I may attempt to keep them warm by wrapping them in garden canvas at night. But in the following weeks, I will need to prepare to overwinter the fig trees.

Here are some of the figs I harvested today.


Friday, October 9, 2015

Pickled peppers from the garden

About a month ago I showed you a picture of the jelly, tomatoes, salsa, and pickles I canned, which you can see in the link here: Canned tomatoes, salsa, pickles, & jelly from the garden. For other ways of preserving garden vegetables, read my post at the link: 7 ways to preserve excess garden veggies

In the last couple of weeks, I have been harvesting jalapeno, banana, and Cubanelle peppers from the garden. Since I had been storing some of them for a while, and considering I harvested peppers yesterday, I wanted to preserve them quickly. I pickled all of the peppers remaining using the following recipe. 4 cups water, 4 cups apple cider vinegar, 1 cup sugar, 1/4 cup salt, and any seasonings such as mustard seeds, red pepper flakes, etc boiled in a saucepan for 2-3 minutes, or until salt and sugar is dissolved. This recipe made enough for 5 half pint + 3 pint jars. I probably sliced close to 4 pounds of peppers, or to be exact, approximately 10+ jalapeno peppers, 20+ banana peppers, 5+ green peppers, and 10+ Cubanelle peppers.

De-stem peppers, and slice. Then add peppers to sterilized jars (boiling jars in water for 10 minutes). Add vinegar mixture to each jar. Make sure your rings are sterilized too by boiling them in water for 5 minutes separately from the jars. Do not reuse lids--you'll have to buy more from the store. But this is only if you're going to sell your preserves, or want to store them for over 6 months.

Once you have your lids on the jars, pressure can them for 15 minutes. My method is by filling an inch of water into a large pot. Let the water come to a rolling boil, then add jars, and cover the pot with a lid.
After 15 minutes, using a towel, transfer the jars to another towel so that they can cool. After cooling, store in the refrigerator. The peppers will be ready to eat the next day. Keep the jar of peppers in the fridge if necessary, but I would store the jars in a cool dry place, and they will store for over 6 months.
Here is a picture of the peppers I pickled today, and additional pictures are of the pepper harvests from the last couple of weeks which I used today in the canning process.


October 8th 2015 pepper harvest


October 5th harvest

September 26th 2015 harvest

September 18th 2015 harvest